Plint: End user documentation
Basic principles and tools available to all Plint Core installations.
Tip: use the search field to find a topic. In order to search for a phrase, use quotes: e.g. "project manager"
- The basics
- This is Plint
- People, projects and jobs
- Default functionality
- Files in Plint
- Customisable properties: keywords, tags, languages and job types
- Understanding workflows and job assignment
- Project structure
- Jobs and joblists
- Creating joblists with joblist templates
- Joblist templates: a detailed guide
- Batch editing joblists
- Resources / People
- Assigning work to the right person
- Assigning work using Skill sets
- The Shark tank / a.k.a. Job tank
- Job visibility logic
- Quicklinks (accessing a job without logging in)
- Accepting and completing jobs
- Built-in communication tools
- The Inbox (Messages, Support and Notes to self)
- From General comments to Inbox: who sees what in a proofing workflow?
- Project forums
- Support/Helpdesk
- System emails
- Help articles
- Specifying availability
- Delivery methods (a.k.a. Actions)
- Report
- Online editing
- Online review
- Media upload
- File upload
- Review/QC using MQM tools
- Auto create subtitles
- Auto FFMPEG render
- Auto delivery
- Auto upload
- ASR
- Automated jobs and job parenting
- KNP / Term bases
- Online editing
- Media files in the online editors
- File versions and creation
- Plint Subtitler manual
- The Report tool: subtitling QC presets
- Supported file output formats
- Tips for project managers and admins
- The project bar
- Project filtering
- Project/job reports
- Finding jobs across multiple projects
- The Calendar
- The Filezone
- Sharing files across projects
- Extended functions for Clients and Resources
- Project defaults
- Notifications about system events
- System timezone
- Finding People by what they've worked on
- Downloading converted subtitles as a batch
- Additional security
- Sharing files with external users
- Handling changes in a subtitling template in mid-workflow (Reset job + Load translations)
- Reusing translations within the same project (Load translations)
- Removing jobs in the middle of a workflow
- Job fees
- Tools & Data (advanced settings)
- Walkthrough: a typical subtitling project
- Quick summary
- Setting up the project
- Uploading source media
- Creating a time-coded template
- Subtitling from template
- Proofing and QC work
- Deliverables
- Release log
- 2021-09-28
- 2021-09-30 Hotfix
- 2021-10-12
- 2021-10-13 Hotfix
- 2021-10-26
- 2021-11-03
- 2021-11-08
- 2021-11-16
- 2021-11-23
- 2021-12-01
- 2021-12-07
- 2021-12-14
- 2022-01-11
- 2022-01-18
- 2022-01-25
- 2022-02-01
- 2022-02-08
- 2022-02-15
- 2022-02-22
- 2022-03-01
- 2022-03-08
- 2022-03-15
- 2022-03-30
- 2022-04-07
- 2022-04-26
- 2022-05-05
- 2022-05-10
- 2022-05-24
- 2022-06-07
- 2022-06-15
- 2022-06-22
- 2022-06-27
- 2022-08-18
- 2022-08-30
- 2022-09-13
- 2022-09-20
- 2022-10-25
- 2022-12-21
- 2023-01-03
- 2023-01-10
- 2023-01-24
- 2023-01-31
- 2023-02-07
- 2023-02-16
- 2023-03-21
- 2023-03-29
- 2023-05-03
- 2023-05-23
- 2023-06-05
- 2023-06-19
- 2023-07-03
- 2023-08-07
- 2023-08-22
- 2023-09-04
- 2023-09-12
- 2023-09-20
- 2023-10-19
- 2023-10-24
- 2023-11-14
- 2023-11-21
- 2023-11-28
- 2023-12-05
- 2023-12-12
- 2023-12-20
- 2024-01-09
- 2024-01-17
- 2024-02-06
- 2024-02-22
- 2024-03-06
- 2024-03-12
- 2024-03-19
- 2024-04-03
- 2024-04-09
- 2024-04-16
- 2024-04-23
- 2024-05-07
- 2024-05-14
- 2024-05-29
- 2024-06-11
- 2024-07-09
- 2024-08-20
- 2024-08-27
- 2024-09-17
- 2024-11-19
- 2024-11-26
- 2024-12-03
- 2024-12-11
- 2025-01-14
- 2025-02-11
- 2025-02-18
- 2025-02-25
- 2025-03-04
- 2025-04-10
- 2025-04-17
- 2025-04-31
- 2025-04-08
- 2025-04-23
- 2025-05-07
- 2025-05-12
- 2025-06-10
- 2025-06-23
- 2025-07-15
- 2025-08-11
- 2025-09-10
- 2025-09-15
- 2025-10-09
- 2025-10-28
- 2025-11-13
- 2025-12-18
- 2026-01-14
- 2026-01-28
- 2026-02-04
- 2026-02-18
- 2026-03-18
- 2026-03-25
- 2026-04-01
- 2026-04-28
- 2026-05-04
The basics
What is Plint and what can it do?
This is Plint
Plint Core is a full-featured and highly configurable system for cloud-based media localization. Powerful tools for workflow orchestration let you define and assign all the steps needed to complete a project. But Plint also provides built-in tools to actually do the work, from normal file uploads to online editing or automated tasks.
Put another way, it makes work ... work.
- For project managers it is a powerful tool for creating and maintaining workflows, and keeping tabs on project progress.
- For freelancers, Plint is an easy-to-use portal for accepting, discussing and completing jobs.
- From a client perspective, Plint provides a bird’s eye view of project progress as well as easy access to deliverables.
Plint revolves around:
- People
- Projects
- Jobs
- Files
Managing projects efficiently
Creating and maintaining workflows often takes time and resources that could be spent on delivering quality work. For recurring assignments, Plint uses highly configurable templates to generate interconnected workflows based on project data. Suitable resources – in-house or external – are automatically selected based on customisable criteria. Automatic notifications and built-in logic makes sure that jobs are done in the right order, but no time is wasted between them. Changes in mid-project can quickly be incorporated and all the necessary jobs automatically added for an additional language or episode. At the same time, details on job level can always be adjusted at any point in the project.
Communication tools
Plint's comes with built-in tools for communicating with both internal and external parties about projects or individual tasks. System messages can be linked directly to projects or jobs to provide a clear context. Other tools include project Forums, a built-in Support area and a Help section whose articles can be targeted to selected users. This allows you to keep as much of the interaction in one system as you like, greatly reducing reliance on e-mail.
File-based or online workflows
While the online editing tools are among Plint’s flagship features, some projects still revolve around delivering and receiving files. Plint can be used to streamline workflows that rely entirely on file delivery, online work, or a combination of both.
"The Dashboard": Plint's home page for all user types. In this case a freelancer with some job offers plus an already accepted job, which is not yet ready for work.

People, projects and jobs
People
People are users/accounts in Plint. They could represent an in-house resource or an outside freelancer, a project manager or a client contact representing a company. They could also be a vendor – a company providing a service. All People can be assigned Jobs in Plint.
Accounts are divided into four types
Workbench
-
- Root / admin users, with access to all projects, accounts and data
Manager
-
- A customisable login type which can potentially access all the same tools and data as a Workbench user
- Access can be set for:
- Specific tools/pages
- Projects or People matching certain criteria
- A built-in limitation is that Manager users cannot edit the properties of Workbench and Manager user accounts.
- A typical example would be a project manager who only sees projects and resources with certain target languages or for a certain client company. They could handle both the projects and the relevant pool of freelancers.
- Another example would be a finance manager with access only to relevant tools, such as reporting and rate cards.
Client
-
- Typically a person representing a client company.
- This account type has read access to all projects for the same company and some tools not available to Resource users.
Resource
-
- An in-house or external user or vendor responsible for specific Jobs.
- Resource users do not have access to overall project information and the general progress. I
- nstead, all necessary information to complete a job is visible in the context of the job itself.
Projects
A project in Plint is something that needs to be done: typically media in need of localization. This might be a single film or an entire series, including supplementals. The project serves as a container for all the information about the project, such as number of episodes and their running times, the source language and the target languages.
Who sees what?
- As a Workbench or Manager user, you have full access to all information within the scope of that project,
- This includes general project data, files and jobs as well as notes and messages linked to individual jobs on the project.
- As a Client user, you can create a project by placing an order. After this point, changes to the project need to be done by a project manager but you can always follow the general progress of the project.
- You also have access to a client Filezone where relevant files for all parts and languages can be made available.
- As a Resource user, you have no overview of the project itself, only jobs assigned to you. All information and files necessary to complete a job are made available within the scope of the job.
- (Some basic Project information is automatically visible to all job owners; such as project title and project manager.)
Jobs
A job is a step that needs to be performed in order for a Project to be completed. Typically a translation job assigned to a freelancer, or preparatory work assigned to a project manager. But it may also be an automated task represented as a job in the workflow: a process.
How a job is done in the system is decided by its Delivery method (sometimes called its Action). A job can only have a single method, and the choice will have great impact. From the "Report" method, which simply lets a user click a button to mark it as done (for offline work, for example), to "Online editing" which opens a built-in subtitle editor, or automatic jobs such as "Auto-render subtitles".
They all have in common that on completion they are set to Done, allowing the next job (or jobs) to begin.
Joblists
Jobs are linked to projects in interlinked chains called joblists. These can be created manually, or automatically using Joblist templates, based on project data.
A number of consecutive Jobs linked to a Project. Jobs are typically assigned to People, but may also represent an automated step.

Default functionality
Plint is a system in constant development, and some features may be available that are outside the scope of the guaranteed toolset. The "out of the box" functionality of Plint includes, but is not limited to:
-
Customisable system data/lists
-
System data can be edited in the system, such as:
- Job types
- Languages
- Help categories
- Tags/Keywords
- Joblist templates
-
System data can be edited in the system, such as:
-
User management
- Administration tools for all four basic login types and their details
-
Workflows
- Chains of interdependent jobs utilising parent-child logic
- With automatic notifications when previous job is completed and job visibility on user Dashboard
-
Project and job management
-
As user access allows, tools for managing the following
-
Project data
- Including tools for reusing default project target languages based on, for example, end client
- Job lists
- Jobs
-
Project data
-
Tools to simplify/speed up job/joblist management
-
Joblist templates
- Including the ability to customise these
- Batch editing tools
-
Assigning jobs using criteria
- Using factors such as a job types, languages and tags/keywords, users can be automatically assigned work
- The same logic can be used to offer jobs to multiple users on a first come, first served basis (“The Shark Tank”)
-
Joblist templates
-
As user access allows, tools for managing the following
-
Project progress view/reports
-
Core functionality includes
- viewing overall progress on multiple projects
- summarising and exporting (CS,XML) data about multiple projects
-
Core functionality includes
-
Inbox / built-in communication tools
- Ability to send and reply to messages, either “stand-alone” or linked to projects or jobs.
- + “Notes to self”, using the same logic
- Notifications about new messages and replies through email
-
Help / Support
- Built-in system for creating and editing Help articles
- Visibility on article level can be set using advanced user criteria
-
Built-in Helpdesk available to all logged-in users
- Any user of “admin” type can be assigned Helpdesk role, on specified help categories
-
Online subtitle editing/creation
- Uploading source media for use in online editors
- Importing external subtitle files in supported formats
- Creating subtitles/template from scratch based on visible video
- Translating from an automatically loaded template
- Reviewing subtitles and adding comments on subtitle level
- Comparing changes in versions/milestones using Track changes
- Returning job for adjustments
-
Other jobs
-
Any user type can perform work including, but not limited to, the following:
-
File uploads
- Including tools for specifying required files and adding detailed information on upload
- Online file review
-
File uploads
-
Approvals
- Several job types include option to reopen previous job to request changes
- This action resulting in backup copies (“milestones”) for future reference/comparison
-
Any user type can perform work including, but not limited to, the following:
-
Job/page locking
- Preventing users from editing the same file/record using built-in editing or administrative tools.
Extended functionality (available on agreement)
-
Media processing
- Built-in tools for converting media and creating deliverables
-
Branding/white label
- Options for changing basic graphic properties to bring system in line with own corporate profile
- Including colour scheme, custom page footer, logo in header and on login screen
-
Automated jobs
- e.g. Automatic rendering of proxies / burnt-in subtitles
-
Finance tools
- Fee calculation based on rate cards/templates
- Invoicing tools for freelancers
- Order profit calculations
- Statistics/reports
- API- based project creation and access to subtitles
Files in Plint
Plint is built to host and handle all the files needed for media localization workflows. With the exception of attachments linked to support tickets and some other cases, files are as a rule linked to a project and available in its Filezone. More details here:
Various types of files
- Source files for download
- With the right settings, the right vendor or freelancer will have access to what they need in order to start work. Audio stems, proxies for download or dialogue lists. But no one else. You are in control.
- Deliverables
- With File upload jobs, anyone with a job with the right setting can deliver a file. It will land in the right project, linked to the right job and visible to the right people
- Media for online editing
- Plint will handle the conversion and preparations needed for playing video proxies in the online editors, with or without burnt-in timecode. All you need to do is upload the source file and select conversion type.
- Subtitling work files
- Plint's internal file format is a structured JSON compatible with all its online editors. It contains not only the localized data but also supports reference text, comments, annotations and lots more.
- On completion, automatic tools can export from these files into various deliverables, such as SRT and TTML.
Customisable properties: keywords, tags, languages and job types
Most of the properties in Plint can be customised to suit your needs. This is done under Tools & Data by a user with sufficient access rights.
There is an important group of properties that can be attached to both people, projects and jobs and used in vital ways: to help create and build workflows, making sure that the right person gets the job or for reporting and simple filtering. They are used to control the visibility of Help articles, making sure only the right users see a certain chapter.
Keywords
-
- These are typically used to characterise a project and the special factors needed to complete it. Adding the same keywords to users enable easy matching between requirement and skill.
- Keywords come in two forms: Client keywords (Volvo, IKEA) and General keywords (for example genres or interest, such as Fishing or WWII).
Tags
Languages
-
- Focused on localisation, Plint treats languages as a separate property.
- A language can also be added/used to represent
- a market (variations on the English text depending on where it is shown)
- or a special localization need, such as dual-language subtitling (French-Arabic).
- Languages can also be categorized into groups.
Job types
-
- Job types are handled as a separate property type as well, but share some traits with the above.
- They can be attached to people and projects and used as criteria:
- example: the job type is Time coding. Only users with the same job type can be assigned the job.
- Job types are also used to automatically calculate rates and fees.
- Pro tip: Don't add job types needlessly. In cases where none of the above benefits apply, feel free to use a Custom job with any label.
- The job type does not affect how the job is done or delivered – that's where Delivery methods come in.
Understanding workflows and job assignment
What is a joblist and how can they be created and edited? How do you ensure the right person gets the job?
Project structure
In order for jobs to be attached to the right part of a project, a structure of "nodes" is created automatically with the following hierarchy.
- Project (top level, there can be only one)
- Part (an episode, a trailer, etc.)
- Language (a target language to localize into)
- Part (an episode, a trailer, etc.)
All Plint workflow logic takes these nodes into account, whether you are manually attaching a job to one of these nodes or if you are applying a joblist template to create a thousand jobs automatically.
Please note that parts can have labels and other additional information which can be used to clarify their use, such as an episode name or an identifier string or number for matching against filenames or external systems.
Simple sample structure
A three-part project with three target languages would result in the following structure. Note that for each part, all target languages are repeated.
- Project:
- Part 1
- Swedish
- Danish
- Finnish
- Part 2
- Swedish
- Norwegian
- Finnish
- Trailer
- Swedish
- Norwegian
- Finnish
- Part 1
Example joblist showing how Jobs (in white) are linked to the various Nodes (in gray) of the project structure. Jobs related to source media (which are relevant for all languages) are linked directly to the part, and language-specific work is linked to individual languages.

Jobs and joblists
Plint revolves around "things that need to be done". A thing that needs to be done is called a Job in Plint. Jobs can be completed in different ways (from just clicking "Done" to changing status after using the online editor to translate a feature film), but they all have the following in common:
- Jobs are always linked to projects.
- A collection of jobs linked to a project is called a joblist.
- The confirmation status needs to be Confirmed in order for work to begin.
- This is typically done by the assignee as a first step.
- But jobs can be set to Confirmed from the start, for example with in-house tasks.
- They can have different statuses.
- In process means that the job still needs to be done.
- Awaiting corrections means that a job has been set to Done and then reopened for additional work.
- Done = completed.
- Cancelled means, well, cancelled.
- Jobs can have parent jobs.
- Until the Parent job is Done, the child job is not open for work.
A typical joblist

A joblist in "Tree" view, showing interdependencies. The "Verify media" job cannot start until "Media upload" is Done, and so on.
Creating joblists with joblist templates
This chapter explains the general logic of joblist templates. For a detailed walkthrough of a sample joblist template, go here:
A joblist in Plint may span hundreds of jobs that are to be completed sequentially. These lists can be created manually, but in most cases that would be way too tedious and time-consuming. This is where Joblist templates come in. They are arguably the most complex feature in Plint, but once mastered also the most powerful. In essence, they consist of a set of rules dictating:
-
where to add jobs,
- For example: once for each part or episode or repeated for all target languages
- in which order they should be done
- using the parent-child logic
-
who should do it
- using the assignment criteria
- and how the job should be done
- such as settings for the online editor, or expected file types for an upload job.
When correctly set up, joblist templates can add a thousand jobs in a matter of seconds. Any number of Joblist templates can be created, but it’s a good idea to try to keep them as general as possible and use tags and other project data to trigger differences.
You need this:
1) A correctly set up project
Since Joblist templates rely on project data, the project itself should be in order first.
This typically means:
- deciding what language is “First” (the template language),
- specifying other target languages
- Optional: adding Tags to target languages.
- Usually it’s also a good idea to
- specify Project manager and
- Client contact person
- before applying the template since certain jobs may be intended for them.
2) A Joblist template tailored for the project type in question
The Basic rules of template rules
a) Joblist templates work with nodes
As explained here.
b) Rules are general
Instead of specifying, for example, what languages to add jobs to, you specify types of target languages, for example the "First" language, or those with a certain tag. Or just parts, for that matter.
Instead of specifying which user is to do a certain job, you specify criteria. When applying the template, the system looks for user matching those criteria. These can be simple criteria, like “Current Project manager” or advanced combinations of factors.
c) Rules contain job info
Any information that can be set for a single job, can be set for a rule. This will make the jobs created by the rule inherit all its properties. Everything from basic job type to advanced settings for the Online Editor.
d) Rules are applied in the order they appear in the list
Simply put: order the rules in the chronology you want for the workflow. When you apply a Joblist template the rules will be applied one by one, going through all the project nodes and looking for the right place to act/add. You can reorder rules by dragging and dropping them.
(Make sure to adjust the Most recently created by option under Select parent job if needed.)
Information on which rule created a job is saved with the job, and can be used by other rules to find the correct parent job.
e) Joblist templates can be copied and tested
The best way to understand them is use them. You can easily duplicate a functioning template and modify it, without destroying the original. And after applying a template to a project, you can use Project milestones to remove all the recently added jobs if things didn’t turn out the way you expected.
Reapplying joblist templates to a project
If you run a joblist template more than once on an existing project/joblist, it will do two things:
- Add missing jobs
- For example if you have added target languages or parts
- or added a tag that instructs the joblist template to add additional jobs
- Re-parent existing jobs if needed
- If, for example, something has changed in the middle of the workflow
What it won't do
- It will not add duplicate jobs.
- A duplicate would be a job in the same node with the same jobtype/custom label
- And it will never change the data of existing jobs.
- If a rule that created the original job has changed, an already created job will never be updated to reflect this
- Changes to joblist template rules only affect new jobs
Joblist templates: a detailed guide
For a presentation of the general logic of joblist templates, go here.
The following is a detailed walkthrough of a complete, generic joblist template. The template in question can be found in a default installation of Plint, under Tools & Data / Joblist templates. A project like the one described here would work as a test subject.
The rules list
Each rule in a joblist template can create one or more jobs. When you apply it to a project, the rules will be triggered in the order they are arranged in the list. The list typically (but not necessarily) follows the chronology of the project steps. The rules can be dragged and dropped to change the order.
However, as you will see, all rules are not necessarily applied to a project. It depends on project or language settings. This allows you to maintain a limited number of joblist templates and use project data to fine tune the results.

Rule 1 – Media upload
The goal in this case to add a "Media upload" job, which will launch the rest of the workflow. We'll also use the first rule to explain all the panels.
-
Add job(s) to:
- Where in the project structure should these jobs be added?
- A project typically begins with media ingest, with one file per part (e.g. an episode of a series).
- Selecting "Part" will add one job of this type to each part (see Project structure).
- Where in the project structure should these jobs be added?
-
Job options (panel one)
- In the first panel you can add general information about the job, such as the Job type, which together with the Custom label will be shown as the name of the job.
- Please note that the selected Job type here happens to have the same name as the Delivery method (see below). This is not necessary but can be helpful in some cases.
- In the first panel you can add general information about the job, such as the Job type, which together with the Custom label will be shown as the name of the job.
-
Job options (panel two)
- Use the Delivery method to specify how the job will be done.
- In this case, a file needs to uploaded to the system and mapped to the correct part, and perhaps converted to an editor-friendly format. There is a built-in Delivery method that makes this easy, called "Media upload".
- If the job should be confirmed by the assignee, set Confirmation status to "Awaiting confirmation"
- Since this is done by the Project manager (see more under "Default person"), that's not necessary in this case.
- Use the date options to calculate a job deadline based on information from the project, such as main project deadline, or the dates linked to individual parts.
- Tip: you can calculate dates backward from a final delivery date: "when does this need to be done in order for us to complete the project on time?"
- or you can take a point in time such as the arrival of the source media and calculate dates forward: "how long will this step take, once we have the file?"
-
Select parent job
- This is perhaps the most complex part of creating joblist templates, but well worth mastering. By supplying the right instructions to the rule, it can ensure that an unbroken chain of interdependent jobs is created. In more concrete terms, it determines the ID of the job which should be the parent of this job.
- Selecting "No" will make this a job independent of any previous work. It will be open for work as soon as it is created. Since the Media upload jobs are the first to be completed for each part, that's the right setting in this case.
-
Default person
- In this case, the Project manager is the right person for the job, so we will use this option.
- There is also an option to select the Client contact.
- Both of these options will use the information from the project in question when assigning the job.
- You can also utilize the automatic assignment logic in Plint for a much more advanced user matching.
- In order to do this, choose "Apply critera" and then select which criteria to use.
- The rules can be applied right away and the "best" person pre-selected as soon as the job is created.
- You can also choose to simply store the rules with the job in order to make the final selection later. To do this, check the option: "Don't assign".
- Explanation: More than one person may be eligible, and a project manager may want to make the final call from a list of relevant users. Or the job may end up in the Shark tank, where anyone who matches the critera will have a chance of grabbing it.
-
Advanced edit
- Finally: anything that can be specified for a single job can be specified in a joblist template rule.
- The settings you select here will be inherited by each job created by the rule.
- A typical example would be "Editor settings", where you determine the behaviour of the built-in subtitle editor.
- If the option you seek is not available in any of the panels, select "Advanced edit" to open a dialogue which matches the edit form for individual jobs.
- Finally: anything that can be specified for a single job can be specified in a joblist template rule.

Rule 2 - Verify media
The purpose of the second job is to make sure the converted video is correctly converted for online editing, including dependencies such as audio wave forms and shot change markers. This being a manual workflow, the job is done by the Project manager by simply opening Plint Subtitler, where the video will load automatically. Like the Media upload job above, it will be added to all Parts and assigned to the Project manager, but there are some major differences:
- There is no Job type for this job. A Custom label is sometimes enough.
- The Delivery method is Online editor.
- Since this tool is where the actual subtitling will take place, it's a good way to ensure everything is in order.
- This job needs a Parent job: the media upload needs to be completed first.
- In order to do this mapping, we use the most straight forward logic: find the most recently created job in the same Part. Since the Media upload jobs are created just before the Verify media jobs, this will work nicely.
- (You can pinpoint matching further by specifying what rule was used to create the parent job)

Rule 3 - Subtitle template creation
There are a few new concepts introduced in the next step. The goal is to create a timed subtitling template which will be used to facilitate translation into a number of additional languages. This first step is done for the "First" language, as explained below.
- The jobs are to be added to a certain language, repeated for each part.
- The language should be the one tagged as "First", which is done on project level.
- Note: There is an additional language setting on project level called "Internal" with the same possibilities.
- This would typically used to flag languages where the work is not requested by the client but may be necessary to complete the project.
- We use a Job type called "Template creation", in order to be able to automatically calculate fees and assign this kind of work to the right user.
- The Delivery method is once again Online editor.
- We use the Project deadline to calculate a Delivery date for this job.
- In this case, the subtitling template needs to be done ten days before final delivery of the complete project to ensure sufficient time for the following steps.
- The parent job should be found in the same Part but not in the same Language.
- We are now moving one level deeper into the project structure.
- The Default person should be selected using Assignment criteria and match three properties:
- Job type ("Template creation" in this case), Source and Target language.
- This means that only users who have these qualities attached to them are eligible for the job.

Rule 4 - Subtitle template proofing
Once the template is created, it will be reviewed by the Project manager to ensure no errors are inherited down to all the subsequent languages. This is of course done in the Online editor.
- Note that the Parent job section includes "In same lang".
- We are now working within a specific language until the template is completely done.
- There is one important difference between this job and the first, which can be found by going to "Advanced edit".
- The "Proofing-type" option will allow the reviewer to mark the job as "Not approved" when changing status after the proofing is completed.
- Doing this will reopen the previous job and allow the template creator to make (or confirm) any necessary changes.
- This is a good example of how a simple adjustment to a joblist template rule will have a major impact on all the workflows created by it. Note: If an important omission like this is found after a project has been launched, you would typically change the live projects using batch editing and edit the joblist template to ensure that future projects are correctly set up.


Rule 5 - Subtitling from a template
Here is where the work from the Template creation steps pay off.
- The Jobs are added to "General target languages"
- These are languages attached to the project which are neither "First" nor "Internal".
- Since we are now expanding into multiple languages from the "First" language, "In same lang" is once again set to "No" when mapping the Parent job.
- There are also a couple of "Advanced edit" settings which are vital here:
- "Load template" makes sure that when subtitlers go to work, the timed template from the previous step is automatically loaded into the editor.
- "Limit editing" prevents the translator from some editing, such as changing the timing and adding clips.
- This is used for projects where it is important that all translations follow a consistent structure.


Rule 6 - Subtitling proofing
Just like the timed template, the translated subtitles require proofing. The options should be familiar by now.

Rule 7 - Additional proofing?
This rule is conditional; it will only be applied for certain languages, the ones with a specific tag. This tag would be added to the target language for the project and in this case tells the joblist template that the language requires additional work.

Rule 8 - Client verification?
Another conditional rule, this one using a tag to the main project data. If found, extra jobs will be added to all languages.
Explanation: the jobs are added to the language nodes, but only if the project has the tag.
The assignee here is the the Client contact. There can only be one of these for a project, so the selection logic is simple.

Rule 9 - Render and delivery
The final job in this example is also a manual one. Using the localizations created (and proofed) using the online tools, the Project manager creates deliverables and ensures they end up in the right place.
The Delivery method is the simple one: "Report". This simply places a button on the Dashboard which the assignee simply clicks to change status to "Done" and thus report that this step is completed.

Summary
The above examples are just this: examples. They are meant to provide ideas based on real-life workflows. Workflows can be even simpler, or much more advanced. The best way to learn these tools is to try them out.
Batch editing joblists
Once a joblist is created, powerful batch editing tools allow you to apply changes to multiple jobs. Any setting you can apply to a job can be applied to many. With a joblist for a project open, select "Batch edit" to see the options.
- Normal batch edit
- With "normal" batch editing, you first need to select which jobs to change. This is done in the top section.
- You can click "Open job list" to see exactly which ones would be affected by the current options.
- With "normal" batch editing, you first need to select which jobs to change. This is done in the top section.
- Batch edit selected jobs
- With this mode, you filter the joblist first. You can then apply a batch edit to the selected/visible ones. Saving joblist filters is especially handy for this kind of work, if you find yourself often applying the same type of change to a certain kind of job. For example a specific target language and job type.
- Run Macro
- Macros are also applied to all visible/selected jobs. You can create new macros when batch editing.
- Fill in the blanks
- This special feature is used for one thing: to assign people to an existing joblist. It takes another look at every unassigned job, and its criteria, and tries to select a user. This is typically done after makes some changes in the user database under People, giving the system a better chances to find the right person for the job.
- Quicklinks
- Quickly create quicklinks for all visible jobs in the joblist
- Calculate job fees
- Use a Resource matrix to quickly fill in Custom job fees for all visible jobs in the joblist
- Or specify a custom fee per unit for all visible jobs
Entering batch edit mode from a joblist

Batch editing in "normal" mode: first select which jobs to affect.

Select what to change. Fields and options left alone will remain unaffected. Confirm by clicking "Batch".

Resources / People
In order to assign work, you need users with the right skills. Information about user expertise is managed under People and can be used as automatic assignment criteria.
The most common login type in Plint is typically a Resource, as in the example below. These are the users who perform individual jobs without needing access to the complete project. In short, they only see what is relevant to complete a certain job. However, Client, Manager and Workbench users can also be assigned jobs based on the same properties and data.
The People edit forms
Like Projects, People can be created or edited using one of two forms. The simple form shown below is often sufficient, and includes:
- Name and contact information
- Email (also used as login name)
-
Status
- Setting this to Inactive will prevent the user from logging in, automatically getting assigned jobs or receiving any system emails
-
Priority is a simple switch used to prioritize users when multiple ones are eligible for a job.
- The lower the number, the higher up in the list the user gets
- It can also be used as basic criteria: i.e. only users with a certain Priority level are eligible.
-
Job types
- Any job type from Tools & Data / Job types can be selected for any user
- These are commonly used as assignment criteria for jobs
-
Vendor / Internal/External
- These options do not change system behaviour but can be used to categorize users
- General keywords, such as genres and areas of interest can be used as assignment criteria for jobs
- The same goes for for Client keywords, which are typically used to specify that a resource is well versed in the terminology and requirements of a specific client.
- Please note that this is different from Client company
- Client company should only be specified if the Resource is dedicated for work for that company, as explained here
- Source and Target languages are also commonly used as assignment criteria
- Invoicing options are used to help calculate job fees in a relevant currency
Note that the jobs determine which requirements are relevant. Sometimes, only the right Job type is needed to be eligible for a job. This means that there is no risk of adding "too much information" about the users themselves. On the contrary.

Assigning work to the right person
A key aspect of workflow management in Plint is ensuring that the minimal amount of time is spent assigning work to the right person or vendor. To this end, there is an array of options called "Job assignment criteria", all based on the concept "match user data with job data". In short, users are categorised with different data, which can be matched against data from the job, or the whole project.
A simple example might be: For all subtitling jobs in Project A, automatically select users who have the same target language as well as the job type "Subtitling".
A more refined example might include the requirement that the users also have the same genre keyword as the project and perhaps a special tag.
These criteria, like all job options, can be configured for individual jobs, batch edited for multiple jobs and pre-set for the jobs that are created using joblist templates.
Available criteria
- Target language
- Source language
- Job type
- Note: The three criteria above can also be combined into Skill sets.
- Keywords
- Tags
- Priority (a simple 1-5 ordering list)
Prioritising matching users
If multiple matching users are found, the Priority setting on user level will automatically come into play, selecting the user with the lowest value first. Tags can also be used to prioritise users. These settings create a "soft" filter that determines who is selected first, but without excluding others completely. Others will still be available when criteria are applied (see below).
Avoiding incorrect assignment with Conflicting job types
[New: Nov 2024]
In order to avoid a situation where the same user is assigned, for example, both Subtitling and Proofing on the same file, you can use the Conflicting jobs feature.
- First, go to Tools & Data / Job types to configure which job types are "in conflict".
- For example "Subtitling from template" could be set to conflict with "Full QC", depending on which job types are in your system.
- With Job tank:
- When a user tries to self-assign a job in the Job tank, the system will check if they have a conflicting job in the same node (e.g. same part and target language). In this case, the user will be notified with an alert and the job will not be assigned to them.
- With "Find random matching user":
- If a job is set to be offered to a "random matching user" on decline (or failure to confirm), the rule will also be applied. A user with a conflicting job will automatically be excluded.
Applying the criteria in practice
There are several ways these criteria are applied. The most obvious way is that the dropdown "Assigned to" is filtered in real time as criteria are added or removed from a single job in edit mode (see picture below). The list here always reflects which users match all the requirements.
The criteria will determine which jobs are shown to a user in the Shark tank (if this function is enabled), and which ones will be notified about available jobs.
If a job has the "User can reassign" option, the criteria will decide who the job can be reassigned to by the current user.
When a joblist template is applied, the settings for the created jobs can automatically be used to pre-assign users. The used criteria will also be stored along with the job, for future reference and use.
The great exception: client company excludes users from work for other clients
There is one major factor that will trump all criteria: if a user is linked to a client company, they will not be available for jobs on project for other companies. Linking a user to a Client company should, in short, only be used where suitable: typically when a major client wants to ensure that an in-house resource of theirs is assigned certain jobs in workflows on projects for them.
Overriding criteria
Anyone with editing access to jobs (such as a project manager fine-tuning a project) can always assign basically anyone, by simply searching on user name in the "Name search" dropdown. This will automatically ignore all other rules, even the "Client company" rule.
The assignment rules as shown when editing a single job. All criteria that are available for a specific job can also be set in a joblist templates, ensuring that all jobs in a certain workflow follow the same rules.

Assigning work using Skill sets
In order to provide more precision when assigning users to jobs, Skill sets were introduced in Plint Core in late 2022.
How it works
Skill sets are a combination of Source language, Target language and Job type. These criteria have always been available as separate properties when matching people to jobs, but the standard implementation is a "mix-and-match" solution where these properties can be combined freely.
Using Standard criteria
User A has two target languages, two source languages and three job types. This makes for twelve possible combinations. There is no way to specify that User A can only do a certain job type in a specific language combination.
Using Skill sets
With Skill sets, you specify a combination of these three criteria, e.g. "Subtitling into Swedish from English". When a job requires the user to match all three criteria, the user needs a skill set with all three.
Example of user with four skill sets. The fourth one has English as the target language. With standard data, it would be impossible to add English for this specific job type without also making the user eligible for other job types into English.

How to activate Skill sets
This is done on project level, using the "Assignment logic" dropdown. Setting this to "Skill sets" will affect all jobs on the project with criteria which include Source language, Target language and Job type.

How to add Skill sets to users
This is done on the Languages tab when editing user information.

Applying criteria with Skill sets
As always, the rules dictating who can do a certain job reside on Job level. In the example below, eligible users would need a skill set with the same Job type and Target language as the job. Note that this job does not include Source language among the criteria. This is perfectly possible and allows you to determine how specific you want to be.

Finding people based on Skill sets
When filtering users under People, select the "Skill sets" option and set it to Yes. This will affect three other filter criteria: Source language, Target language and User job type. Searching for this kind of data will now be confined to Skill sets.
Please note that you cannot search for multiple languages or job types when using the Skill sets option.
The logic is the same as when you apply the assignment criteria: omit a field to make a "wildcard" search. For example, search only on Target language and User job type. This will ignore the Source language factor and thus give you more results.

The Shark tank / a.k.a. Job tank
When several users may be right for a Job and your main concern is just to get it done, you can "throw the job in the Shark tank". This is a setting on job level that means that any eligible user can "grab it". It works like this (using a single job as example):

- Specify or check the Assignment criteria of the job
- Are they too generous? Or are there too few eligible users?
- Tip: You can open the "Assigned to" dropdown to see all matching users.
- Are they too generous? Or are there too few eligible users?
- Set the job to "Shark tank".
- Optionally: use the notification option to notify all matching users.
That's it. Now all matching users can see the job and self-assign it. This will effectively remove it from the Shark tank for all other users, since only unassigned jobs are shown here.
From the user's point of view it looks like this (more info here):

These settings can of course also be batch edited or applied right from the start using Joblist templates.
Job tank 2.0 (API)
As of 2023, there is also API support for the Job tank, but this implementation works somewhat differently from the classic job tank:
- Instead of relaying on real-time checks comparing user data against the job criteria, jobs are actually placed in a list. This list contains a reference to matching users and Job ids.
- This greatly improves performance and traceability.
- Populating the list is done by announcing job tank jobs from the joblist (see below).
- Sending out email notifications (the green buttons) now have the added benefit of populating Job tank 2.0.
- You can also populate the job tank without sending emails (blue button).
- All jobs which are set to Job tank = yes and not assigned will be added, based on the assignment criteria and user data at that time.
- This means that changing the criteria or adding new users with matching data after this point will not automatically result in new job offers in the tank. You need to use the announcement function again.
- Sending out email notifications (the green buttons) now have the added benefit of populating Job tank 2.0.
- Conversely, in order to remove jobs from the tank, you can:
- User the "Clear job tank" option in the same dialogue to clear all offers from the specific project.
- Or, if your user settings allow, go to Tools & Data / Job tank. This page shows all available job offers. You can filter out a selected group of jobs and delete all of them at once.
(Please note that the Job tank tab on the classic Plint Dashboard still uses the real-time logic, as described above.)
Announcing job tank jobs from the joblist


Filtering and batch deleting job offers under Tools & Data / Job tank

Job visibility logic
The Dashboard shows jobs that are assigned to the currently logged in user. This is true for any user type. The following logic is useful to understand.
- The default Dashboard setting is to show only jobs that are open for work.
- That is, the parent job is Done.
- and the job itself is either In process or Awaiting corrections.
- Jobs that are Awaiting confirmation are always visible.
- Regardless of whether a job can be started yet, it will be shown on the Dashboard if the user needs to confirm that they accept the assignment.
- The user may also filter their Dashboard to show the information most relevant to them, for example by:
- Showing all jobs on their Dashboard (including those not yet ready for work).
- Showing only jobs linked to a certain project.
- Completed work is visible in the Job archive.
- This page is found under the account menu in the top right corner.
Preliminary jobs
A job may be assigned and ready for work but set to Preliminary. In this case, it will not be visible to the assigned user. The purpose is to let a project manager verify and fine-tune all job assignments before requesting job confirmations.
Dashboard of a Resource user showing two jobs: one which is ready for work and three jobs that needs to be confirmed.

Quicklinks (accessing a job without logging in)
There are times when you need to outsource a job to someone who is not a registered user in the system. This can be accomplished with Quicklinks, an additional feature only available for online editing jobs.
A quicklink consists of the URL to the job in question along with a token. This link can be emailed or communicated to any, such as a client contact or external consultant for final review. The token, if valid and not expired, allows the user to open the job without logging in.
Please note that the link only works for this specific job and will not include access to the Dashboard or even the Job information page. All information necessary to complete the job needs to be available in the editor (for example in the form of the job description) or made available through other means.
Creating quicklinks
From the job itself
- If the job settings allow it, any user with access to a job can create a quicklink to it from the editor.
- This option is enabled for a job on the "Editor settings" tab: Allow use of Quicklink
- The Quicklink button opens a dialogue where existing quicklinks are shown and can be shared/emailed, or new links created.
Enabling quicklinks for a job

Using the function from within Plint Subtitler


From the joblist
- A project manager can create quicklinks for multiple jobs in the following way.
- Go to the Joblist
- Open the Batch edit menu
- Select Quicklinks and follow the instructions
- From this dialogue, you can copy the list and, for example, distribute ut by email.
- Tip! If the links are already created, you can show selected links by filtering the joblist first (for example on target language or part.)
- When you open the Quicklinks dialogue, only the existing links for the matching jobs will be shown.


More on quicklinks
- To retract access to the job through a quicklink, the link itself can be removed or disabled. The easiest way, however, is to change the job setting, setting "Allow use of quicklinks" to No.
- Normal job access logic also applies to quicklinks. This means that if a job is Done, or its parent job is not done, the quicklink will not work.
- This is to prevent someone from opening a job prematurely, or too late. Since the link is the user's only means of access to the system, they otherwise have no way of knowing if it's open for work.
- Finally, if a job is already opened by someone else, the system will prevent other users from accessing it through a quicklink.
- If someone forgets to close/pause a job, they will be automatically sent to the Pause page or Dashboard after a while to prevent a job being stuck in "limbo".
Accepting and completing jobs
From a freelancer or in-house resource perspective.
Receiving job offers as a freelancer or vendor
As a freelancer or vendor, there are two ways you can be offered work in Plint.
Jobs pre-assigned to you
- Based on previous work or other criteria, you have been assigned a job.
- These jobs normally need to be accepted by you before work can begin
- In status terms they are "Awaiting confirmation" and need to be "Confirmed".
- You will typically:
- A) Get an email listing general job info.
- Click on the link to the job to see more information.
- B) See the offered jobs on your Dashbord when logged in.
- Click the job name to see more information.
- The level of detail in the job information differs, but should include a fee.
- A) Get an email listing general job info.
- If all looks satisfactory, just use the "Reply" option and select "Accept"
- Tip: From the Dashboard, you can select multiple jobs and reply to all of them at once.
- Clicking "Maybe" will allow you to provide feedback to the project manager. You may suggest an alternative deadline or want to discuss the fee. Submitting this feedback will not set the job as Confirmed.
- The feedback will initiate a Message thread which you can follow:
- From the Inbox
- From the Messages tab of the job itself.
- The feedback will initiate a Message thread which you can follow:
- If you are unable to accept a job, please notify the project manager using the Decline option.

Jobs in the Job tank
If you see jobs in the "Job tank" (formerly known as the Shark tank) on the Dashboard, or receive an email notification about a job offer, this means that there is work matching your skills, but that it may be offered to multiple users. Whoever accepts it first will be assigned. Click "Grab" to take it. If someone else has already grabbed the job before you click, you will be informed about this and the job will disappear from the Job tank.
Please note that there is no "Maybe" option for Job tank jobs. Typically, these jobs follow set fees and deadlines.

The "Project summary"
Normally as a freelancer or vendor, your overview is limited to specific jobs. There may be times, however, when a number of jobs are offered to you as a whole bundle, especially in the case of vendors. If you see a job with a "Project summary" button, you can use this for an overview of all work offered to you on the whole project.
The "Project summary" button

Project summary example. From this view, you can also export summarised information about the jobs in CSV format.

Communicating about jobs
The Inbox in Plint holds all Messages, Notes to self and Support cases created by you, or involving you. Notes and Messages can also be linked to specific jobs, giving it a context. This is done automatically when you reply to a job offer with a comment, and when you add a "Comment to project manager" when completing a job. Additionally, you can at any time initiate a conversation about a job with the Project manager, directly from the Messages tab of the job.
All of these actions will start a communication thread shown on the Messages tab of the job. Conversely, if you view the same message from your Inbox, a shortcut to the job info page will be shown at the top of the thread.

"Message Project Manager" window

Visibility
Please note that when a Message is linked to a job, it may be of interest to other administrators and project managers with access to the project. For this purpose, they may also have access to such conversations and info. Other resources/freelancers will not, however.
Built-in communication tools
Support/Helpdesk, the Inbox and project forums. Which tool should be used for what?
The Inbox (Messages, Support and Notes to self)

The Inbox is your hub for two-way communication with other Plint users (or one-way in the case of Notes to self). Messages, Support cases and Notes to self each have a corresponding tab and share the following traits:
- Communication is threaded (post/reply)
- Posts and replies result in email notifications to the recipient but communication should be kept in the system.
- I.e. log in and go to the Inbox to reply.
- Files can be attached to any post or reply.
- Supported formats, such as images, short film clips and PDF:s can be previewed in the browser, whereas other formats may require downloading.
Closed/Open, Read/Unread
The counter in the menu and on the tab indicates the number of open items. A red counter indicates one or more unread item.
Threads can be Closed or Opened by either party at any point. Closing a Message thread or Note will simply change its status, removing it from the default view. It can still be found, and reopened if needed, by searching for Status: Closed.
Messages and Notes linked to jobs?
From General comments to Inbox: who sees what in a proofing workflow?
Besides literally starting a message thread with a project manager from a job info page, there is another step in Plint workflows which will automatically launch an Inbox message thread with the project manager: adding a General comment on status change.
This comment can also be made visible to other users. The example workflow below should give you an idea (see bottom of page for screenshots):
- Freelancer A completes a job in Plint Subtitler
- Freelancer A changes status and leaves a General comment
- Adding a General comment automatically creates a Message thread with Project manager
- The thread is linked to the job
- An automatic notification email about this thread is sent to the PM
- The notification includes the General comment
- A standard "Job open" automatic email is also sent to the owner of the child job
- In this case Proofing, owned by Freelancer B
- This email does not contain the General comment
- However, Freelancer B can see the General comment under "Track changes" in Plint Subtitler along with the Milestone for the status change
- Freelancer B completes proofing in Plint Subtitler
- On status change, Freelancer B set Approved to "No" and adds a General comment
- This comment also results in a Message thread
- This one between Freelancer B and Project manager
- (Each freelancer can only see their own threads with the Project manager)
- Since the translation was not Approved, the parent job is reopened
- An email explaining this is automatically sent to Freelancer A
- This email contains the General comment
In summary
A status change always results in an email notification to the owner of the job which is now open for work. Depending on the scenario, this job may be a child job or the parent job.
Adding a General comment on status change also starts a Message thread with the Project manager.
It is up to the project manager how to handle these. If the information does not need to result in further action or communication, they can simply close the thread. If the information in the message thread should be easily available throughout the project, for other project managers as well, it's advisable to leave the message thread open. This will ensure that the message icon is shown in the joblist, for example.
About closing messages
- Closing a message thread also closes it for the other person (it can still be found under "Closed" messages).
- This will also remove the Message icon from the joblist and the message will not be included in the Inbox counter
The workflow described above as seen in a joblist in tree view

On status change, the Template creator leaves a General comment

The automatic message thread is marked in the joblist

And can be viewed from the job info page by both project manager and job owner

The owner of the child job, Proofing, gets a standard Job open email (which does not contain the General comment)

The owner of the Proofing job completes the review, changes status, chooses Approved=No and adds a General comment

The owner of the (reopened) parent is notified by email. This notification does contain the General comment.

The General comments can always be seen under "Track changes" for the respective Milestone, (if the job allows Track changes and Milestone comparison)

Project forums
Each project comes with a built-in forum (unless you deselect that option when editing/creating the project). The Forum is accessed through the "bubble" icon in the project bar (regardless of login type).

On the forum page, previous topics are listed, along with an option to create a new topic.

Who sees what?
Forums are meant for communication between multiple users. The simple rule is that anyone who has a job on the project also has access to the forum and will receive notifications about new topics.
(However, you can exclude a certain user from all forums. This is a setting on user level.)
Email notifications
When a new topic is created, all users with access to the forum will be notified. To receive notifications about new posts in a topic, you can Follow (or "star") it. Replying to a topic will automatically make you follow it, but you can manually change this at any time.
Support/Helpdesk
Any user can request help by going to Inbox / Support. Asking a question here will create a new ticket to be handled by a Plint user who is set up to handle Helpdesk issues.


Setting up a Helpdesk
Staffing and preparing the built-in helpdesk consists of the following steps.
- Prepare Support categories
- Support categories are handled under Tools & Data and can be associated with Tags.
- This means that only users with matching tags can select that category.
- When editing a user, turn on notifications for Support tickets under the Notifications tab
- This will make them a member of the Support staff and add the "Helpdesk" option for them under the Help menu
- Selecting "Access without notification emails" will turn off notifications but still allow access to the Helpdesk
- Selecting Support categories for the Helpdesk user will:
- prefilter which new tickets they see in the Helpdesk section
- determine which tickets they get notifications about
- Any Helpdesk user will still be able to see, and be assigned, any ticket, using the search tools.
Using the Helpdesk
As a Helpdesk user, the first thing you see will be a tab showing new tickets. These, in turn, will reflect your support categories.
 Click on a ticket to see the details and assign it to yourself, or someone else.
Initiating a support case for another user
If you have, for example, received a question from a system user over phone or email, you can initiate a support case and select the person in question as "User". The result will be exactly the same as if the same user had opened the case from within Plint.

The search option / reusing searches
Clicking Search will bring to a search form where you can combine various criteria. A search can be saved and named to be easily reapplied at a later date. It will also be available as a quick search option on the "New tickets" tab. This allows you to switch quickly between your "standard issues" (those matching your categories) and more specialised searches.

System emails
There are two basic types of emails sent by the system: automatic notifications and custom-created emails, normally sent to several users.
Note: Inactive users will never receive system emails.
Automatic job information emails
Forum updates and Inbox / Support events will typically result in automated email notifications to the user(s).
In the following cases, automatic emails will also be sent. They contain a summary of the information usually relevant for this kind of notification and cannot be edited by the project manager. If a person is assigned several jobs which are the subject of a notification, a single email will be sent, summarising the information.
- When a job is completed by the assigned user, causing a status change, the system will look for a child job (which would now be open for work).
- If one or more are found, all owners of those child jobs will be automatically notified by email.
- When a job is reopened for additional work.
- This happens when a job is set to "Proofing-type" and the job owner selects "not approved" on status change.
- When a project manager uses the function to request job confirmations from assigned users from the joblist page.
- When a project manager uses the function to alert matching users about work in the Shark tank from the joblist page.
- Custom notifications can also be set for specific users, about for example:
- New projects/orders
- Status changes on projects where they are the project manager

Bulk emails from People page
Bulk email can be sent from the People page, targeting every user that matches the current filter. Email content can be created from scratch in the message window, or you can create an email template under Tools & Data to quickly reuse common messages.
How to use:
- Go to People
- Filter out relevant recipients
- Click "Email users"
- Compose your message (or load a template)
- Submit
- Optionally, you can send a test email to a specified address first, to check the message's appearance in your email client before sending it to multiple users.

Help articles
Under Help / Documentation, help articles targeted to different users can be shown. Here's how to edit and create them.

Editing and sharing Help article
As a Workbench user, or Manager with sufficient privileges, you can create and edit articles under Tools & Data / Help texts.
Please keep the following in mind.
- No article is shown under Help / Documentation unless "Ready for publication" is set to "Yes".
- Try to organise content under relevant parent articles.
- This will help both when editing and viewing.
- Editing rights is not the same as visibility
- You may have full access to all articles under Tools & Data for editing, but you may only see some of them under Help / Documentation (see "Visibility criteria").
- Share the right URL
- If you want to share an article using an URL, don't send the link you use to edit them. They will probably not have access to this page.
- Instead, use the URL for viewing the article.
- The "Copy Help URL" button shown in the article overview will send this link to your clipboard.
- You can also use the dropdown to link to a Help article when replying to a Support case.
- If you want to share an article using an URL, don't send the link you use to edit them. They will probably not have access to this page.

Visibility criteria
Various criteria can be used to determine who sees a certain article – not unlike the criteria used to assign work. To facilitate this and create a clear structure, you can start by creating a main (parent) article with certain requirements. And child article attached to this will only be shown to user who match the requirements for the parent article.
Tip: start with a main requirement for the parent article, such as a keyword or tag. You can then add child articles targeted to different users using additional requirements. Like so:
- Parent article: "Freelancer info about project A"
- Requirement: tag "Approved for project A"
- Child articles
- "Project A, Swedish"
- Requirement: Target language = Swedish
- "Project A, Norwegian"
- Requirement: Target language = Norwegian
- "Project A, Swedish"
Only users with both tag "Approved for project A" and target language Norwegian will see the second child article.
Specifying availability
In order to help project planning, any user can add information about when they are not available for work. This is done by adding an event under: Account icon / Profile & settings / Schedule

Project manager tip:
You can show the Schedule column under People to immediately see the near term availability of all selected users.
Delivery methods (a.k.a. Actions)
How a job is actually done in Plint is defined by its Delivery method (also called an Action). Additional methods are continuously added.
Report
The simplest delivery method allows a user to click a button and report the job as Done. This will change the status of the job and look for child jobs. If any are found, job owners are notified that their work can now begin. Setting the job as Done also removes it from the user's Dashboard.
Report jobs are good for offline and custom work that is a required part of a workflow but do not correspond to another delivery method.
A Report job on the user Dashboard.

Online editing
Online editing jobs allow any user to originate or translate in Plint using their browser. The common logic around online editing is explained here. Plint Subtitler is covered in detail here.
Online review
Akin to online editing, Online review enables files in standard formats (doc, video, pdf ...) to be reviewed and refined in a simple workflow:
- User A: Upload file
- User B: Review in browser
- Approve (done)
- Not approve
- Parent job reopened for new upload by User A
- Repeat until perfect
As with online editing, you can add a general comment on status change and a history of versions is maintained.

Media upload
This delivery method serves a very specific purpose: to supply the system with video (a "proxy") which will be automatically loaded into the online editors. Using this method will automatically set the right File mode and link it to the same node as the job. Only a single file can be uploaded.
The file will also be analysed after upload. The extracted metadata, such as resolution and framerate, can be viewed by clicking the "Information" icon for the file in the Filezone.
The running time may also be automatically entered on part level for the project. Please note that this is only done if the site has this global setting turned on and the project unit is set to minutes.
Files can also be automatically converted into an editor-friendly format using the built-in transcoder.
More here.

File upload
Unlike Media upload, File upload jobs support multiple files. This delivery method simply "delivers" the uploaded files into the project Filezone (setting them to File mode "Standard" by default). After upload, the user can add description and other information for any or all files before changing status.
"File upload - advanced" works the same way but allows the user to specify more information/options per file.
The information that can be specified for each file includes:
- File description
- can be any text
- File categories are edited under Tools & Data
- If one or more categories are mandatory, the File upload job cannot be completed until this category has been linked to a file
- Which categories are available for selection for a certain upload job is determined on job level
- This is done under the "File settings" tab
Adding file information before status change

Review/QC using MQM tools
Plint Subtitler supports a review mode where each change/error is logged according to a standardised set of issue types. Using these tools involves a combination of tools and settings rather than a single Delivery method:
MQM (Multidimensional Quality Metrics) is a framework for objective assessment of translation quality, using standardized error categories and severity levels to calculate a quality score. Depending on the demands, categories can be adapted/omitted and the threshold levels for acceptance adjusted.
Adjusting and understanding the MQM settings in Plint
Under Tools & Data / MQM Settings, a site admin specifies how the various error categories will affect the report. Each reported issue will add a number of points to the accumulated error score. This number depends on what value is entered here for the selected Category and Severity (e.g. "Minor"), multiplied with the Weight. In the below example, a Major Mistranslation would result in 120 points.
The "Max allowed errors" setting determines if a job will Pass or Fail, based on the following calculation: is the combined score per 1000 words higher or lower than this threshold? This calculation is done when the report is completed and summarised (see below).
It is highly recommended that you make any such changes early on, to ensure that reports aggregated over time can be compared in a meaningful way.

Plint Subtitler in MQM mode
The actual review is done in Plint Subtitler, in a dedicated MQM mode. How to use this mode is explained here. The mode is activated on the Editor settings tab:

An MQM Report job (optional)
This job consists of viewing the report after the quality control has been completed. All reports are stored and linked to the users (Reporter / Translator) and can be accessed as needed for the users in question. However, in order to quickly assess the result of a test, you can create a job and assign it to a project manager, vendor manager or similar.
You create such a job with the Delivery method "MQM Report".
The job itself will appear on the user's Dashboard with an icon leading to the report (red or green, depending on Pass/Fail status). There is also a button to report the job as Done and remove it from the Dashboard. Please note that this will not remove the report from the system:

Reading the report
The report will summarise the result by showing the number of individual errors and their categories and severity, along with charts and statistics. You can also export the complete list of errors in Excel format.

Aggregated data on user level
By going to a user's summary page, you can find all their MQM reports. They can be viewed individually, or summarised with the "Aggregated MQM Scorecard" link.

Auto create subtitles
This automatic action converts a file from the internal system format into a deliverable (e.g. TTML, SRT). The created file will be stored in the project Filezone for easy access by project managers and other users. With additional settings, it can also be made visible to Resources (from a job) and Clients (in Client Filezone).
If unsure, you might also want to read up on how parenting works with automated jobs
Key concepts
- The source file is the current version of the online editing file for the job's node.
- Example: the Auto create subtitles job is linked to part one of a project, and to the German language node.
- The system will look for an online editing file in the same node
- Any available delivery formats can be selected, including the original JSON file
- Additional formats are continuously added.
- By combining information about the project as well as language and part information a custom filename can be instructed.
- E.g. project ID + "_" + language code + "part" + part number
Example use case
- Prepare a subtitling workflow consisting of
- Translation
- QC
- Auto subtitle creation
- When the QC step is done, the subtitles will then be created automatically
- When all subtitles are completed, a project manager
- enters the project Filezone
- filters out all deliverables (based on file extension, for instance)
- batch downloads all files
- and delivers
Automating delivery
By making a file "Visible to client in filezone" you could allow the client users to fetch completed files themselves. However, that may not be convenient in all cases. By placing an automatic delivery job after the subtitle creation job, subtitles can be automatically sent to an external server (AWS S3, FTP ...) virtually seconds after approval, in the selected format.
Auto FFMPEG render
If unsure, you might also want to read up on how parenting works with automated jobs
This option lets you create deliverables using the files in the project, including the video file. A typical example would be a video with burnt-in subtitles. In order to use this you need.
- A video uploaded to the project and set to mode "Standard".
- It also needs to be linked to the same node/part as the job that the translation is linked to.
- Typically, this video should be a hi-resolution file without burnt-in timecode or text.
- The simplest way to attach such a file to the project while also being able to work in the online editor is to use the "Media upload" delivery method for a previous job and select a conversion preset in the upload dialogue.
- This will automatically store the original file with the project and create a lo-res proxy for the editor to use, giving them both the correct settings
- (But adding the necessary files can also be done directly in the Filezone)
- The simplest way to attach such a file to the project while also being able to work in the online editor is to use the "Media upload" delivery method for a previous job and select a conversion preset in the upload dialogue.
- A node with a subtitle linked to it
- I.e. a subtitle file created by online editor
- A Render preset
- This determines the details of the output file.
- Text styling, video resolution and container, audio format, etc
- These are edited and created under Tools & Data and require some in-depth knowledge to manage
- The two styling options support:
- ASS: Italics, Raised, Bold, Underline, Coloured text
- SRT: Italics, Raised, Bold, Underline
- In order to use alternative fonts, they first need to be uploaded under Tools & Data / Fonts.
- This determines the details of the output file.
By combining these three, Plint can automatically create deliverables as a job.
The same tools and logic can also be applied to render videos "ad hoc" from the page Generate video copies, which can be accessed from the project bar.


Auto delivery
Auto delivery is an automated delivery method that can be used in any workflow. When the parent job is done, the Auto delivery will be initiated and files delivered to a predefined location determined by the Connection profile. When you select the "Auto delivery" method, you can select the Connection profile and additional settings on this tab.
Only files linked to the same node (e.g. part/language combination) as the delivery job will be sent to the location. If you have multiple files in that node, you can create a pattern to select what files to deliver. The example below shows how two patterns, separated by a pipe character, can be used to target both MP3 and docX files.
What you need:
- At least one Connection profile (under Tools & Data).
- A job on a project, with a parent job
- Set this job to Delivery method "Auto delivery"
- Specify delivery settings on the now visible "Connection profile" tab
If unsure, you might also want to read up on how parenting works with automated jobs
Folder structure

If "Deliver files to storage root" is set to "Yes", the files will be sent directly to the location and (optionally) sub folder specified in the Connection profile. If this is set to "No", a folder structure matching data from the project will be created in that location, according to the following pattern: project name/part label/language name. (If the parts are unlabelled, all files for the same language will be sent to a single folder).
Auto upload
Auto upload is an automated Delivery method that can be used at any point in a workflow. Each job will monitor a predefined location (see Connection profiles for files and ingest them into the system when found, for example a source media file. The file(s) will be linked to the same node as the job itself and be found in the project Filezone, just like any upload. You can use dynamic filename matching patterns including wildcards to fetch the right file, for example media for a specific part or episode. By adding language code as a criteria you can be even more specific.
The fetched files can be given the same properties as when editing them in the Filezone, such as "Visible on Files tab". They can be set to Media files to be used in the online editor, or Standard files if they are to be delivered or processed further.
What you need:
- At least one Connection profile (under Tools & Data).
- A job on a project
- Set this job to Delivery method "Auto upload media"
- Select Connection profile and other settings on the now visible "Auto upload" tab
How it works: At regular intervals (every 10 minutes) each connection profile with attached Auto upload jobs will be checked for matching files. (Please note that the option to specify the checking frequency has been deprecated as of fall 2021.)
Auto upload jobs need to have status "In process". They can be paused or aborted by changing job status. When files are found and fetched from the selected location, the job in question will change status to Done, which will stop the task and open any child job(s) according to normal Plint logic.
A workflow starting with an automated Media upload job. When a source media file is available in the selected location, it will be automatically ingested, launching the rest of the workflow.

The settings tab for an Auto upload job. In this example, files whose name include the part media id matching this job will be found and ingested as Media.

ASR
ASR availability will depend on site settings
If unsure, you might also want to read up on how parenting works with automated jobs
The "ASR" Delivery method sends the audio of the current media for the node to an external service for Automatic speech recognition. The result will be parsed into Plint's internal subtitle format and attached to the current node. This means that a subsequent job in Plint Subtitler can automatically load this file for further work, such as post-editing. The file could also be automatically converted to a delivery format and used right away, although this is rarely recommended with raw ASR output.
A typical setup:
- A project with the correct source language specified
- Attach/upload media to each part, in typical fashion
- After the media steps (i.e. upload/convert/verify), add an ASR job
- This job can be attached to the part itself, or to a target language
- Follow this with a online editor job, for reviewing and adjusting the file

In this example, once the media has been verified and the user changes status, the ASR job will trigger automatically. When this process is completed, the ASR job will automatically change status and the review/post-editing job will become open for work. A subtitle milestone will be stored and can be seen under Review / Track changes to enable easy comparison between the original and final versions.
Settings
There are three main settings which can be applied to the ASR job:
- Service
- Depending on what is enabled for your platform, options may include "Azure", "AWS", and others.
- Segmentation
- Rule-based segmentation will take into account the Report tool rules matching the job when splitting the text into individual subtitles, basing the subtitle length on the minimum/maximum duration setting.
- The Basic variant will only take the duration setting into account when deciding where to end a subtitle. This may require increased post-editing.
- The Improved variant takes longer to process but will reduce the risk of single words ending up at the beginning or end of subtitles.
- Whereas Sentence segmentation will allow longer clips and base the clip length on punctuation.
- This is suitable for non-subtitle work and for when you prefer to do the splitting at the post-editing stage, for example using Plint Subtitler shortcuts.
- With both types, the Clip separation rule matching the project/job will always be applied to ensure that correct spacing is used between subtitles.
- Rule-based segmentation will take into account the Report tool rules matching the job when splitting the text into individual subtitles, basing the subtitle length on the minimum/maximum duration setting.
- Speaker recognition
- This option will attempt to use the third party service's speaker recognition functionality. The result can be stored either as the first line of the subtitle, or in the Annotation field. The latter field can be either visible, hidden or editable in Plint Subtitler, based on job settings.
- Please note that with Rule-based segmentation, it is common to get more than one speaker label with the same subtitle. They will all be saved on a single line.
- Example (Rule-based segmentation, Speaker label stored as part of Subtitle)
-
- Example (Rule-based segmentation, Speaker label stored as part of Subtitle)
- This option will attempt to use the third party service's speaker recognition functionality. The result can be stored either as the first line of the subtitle, or in the Annotation field. The latter field can be either visible, hidden or editable in Plint Subtitler, based on job settings.

ASR settings tabs

Things to note
- Depending on the segmentation type, certain values will be mandatory in the Report preset in order for the job to run properly. To ensure complete functionality with rule-based segmentation, make sure the Report preset has settings for:
- Subtitle separation (formerly Clip separation)
- Duration (min and max)
- Maximum characters per line
- The ASR process can also be run "ad hoc" using the microphone icon in the joblist
- An ASR job set to "Awaiting corrections" will not run automatically
- This status is used to indicate that something went wrong with the process and something will probably need to change before another attempt is made.
- Ensure that the service you select supports the current source language, or the process will fail.
- For AWS (Amazon Transcribe), the list can be found here.
- For Azure (Speech to text), see here.
Automated jobs and job parenting
Understanding the following concept is essential when using automated jobs:
For all automated jobs except "Auto upload", the action is triggered when the parent job changes status. Status change needs to be done through the parent job, for example by clicking "Report as done" on a Report job or through the "Change status" dialogue in the online editor.
Simply editing or batch editing the properties of a job and setting status to "Done" will not trigger automatic jobs.
Typical examples:
- Media verification in Plint Subtitler, followed by "ASR"
- Final QC in Plint Subtitler, followed by "Auto subtitle creation"
- and perhaps "Auto delivery"
KNP / Term bases
In order to ensure consistent terminology, Excel sheets with termbases (aka Key names and phrases) can be uploaded into Plint Core, linked to projects and used within Plint Subtitler as a live help while translating.
Adding KNP to a project includes these steps
- Create or update an Excel file with terms and phrases in all relevant languages
- Import this file into Plint Core
- Link it to a "Production KNP"
- This could be anything from a certain client, a topic or a TV show – anything with a specific terminology.
- Create a project linked to the same Production KNP
- Include a step in the workflow to add KNPs to the JSON work file
The Excel file
The file needs to follow a certain format (a template is available on request). The second and third columns (source and target language) are mandatory. The rest can be used for additional information, for example when working on a shared Excel book.

Specifying language
Each target language requires a corresponding tab in the file. The most important part is to specify the language code in quotes on this tab, e.g. "sv". This code must match the target language on the project exactly, including locale if used. ("sv-SE" will for example not match "sv").

Importing the file into Plint Core
Under "Tools & data", go to "Production KNP". This is always available to Workbench users and can be added for Manager roles. To introduce a new "Production KNP", click Create. You can also edit an existing one.
Please note that uploading a new file to an existing KNP will remove all current terms and phrases before adding new ones. This is to ensure that outdated terms are not used.

Upload the Excel file and check the result before saving.

Link the KNP to the project

Add KNP jobs to the project
KNP jobs are automatic jobs that add information to the work file. They must be run when the template text is in place but before the subtitler starts working in Plint Subtitler. This is typically solved by adding these jobs to a joblist template, but KNP jobs can be added manually for testing, as long as the workflow is intact.
In this example, the KNP jobs have already run, triggered by the status change when the English template was completed. The jobs need the Delivery method "KNP" and what they do (besides importing the template if needed) is to augment the JSON file with suggestions based on the reference text.

Seeing and using the result in Plint Subtitler
We now have a work file prepopulated with the refefence text and suggestions for how certain terms are to be translated.
When the user moves to a block with such a term, it is highlighted. In order to simply insert the suggested term, just click on it in the list under "Production KNP".

Online editing
Reclaim the time your resources spend on getting ready for work, locating media and file versions, updating desktop software or finding emails with comments. In Plint, they can simply click "Go to work" and go to work, once the project is correctly set up.
In order to create the best workflow and prepare the perfect joblist template, understanding the logic is very valuable. The basic logic and principles for most online editing work is the same.
Media files in the online editors
In order for online localization workflows to be performed, a lo-res media/video file (here referred to as a "proxy") is normally required. In the case of subtitling, the same video file is typically used for all jobs within the same part/episode and only needs to be uploaded once. When this is in place, with the correct settings, the online editors will automatically locate and load the file into the player when a job is opened for work. Here are the basic rules.
Media requirements
- Typically, a MP4 file is the best option. You can either:
- upload a prepared proxy with or without burnt-in timecode
- upload any file and select an automatic conversion preset
- More presets can be created under Tools & Data.
- When a file is set to file mode "Media", some additional preparation work begins automatically.
- These are the steps needed for the media to work in Plint Subtitler. Such as:
- Generation of audio waveforms and scene change markers.
- Conversion to M-dash format.
- If activated for the site, DRM preparation.
- You can follow this process under Tools & Data / Renders or from the project Filezone.
- These are the steps needed for the media to work in Plint Subtitler. Such as:
Media files can be uploaded in several ways, including:
- Directly to the project Filezone
- In this case some manual editing is required after upload:
- The file may need to be converted to a format suitable for a proxy.
- The built-in conversion function can be accessed with the arrow icon.
- Set File mode to Media.
- Link the file to the right Node.
- With a "Media upload" job.
- If the workflow is set up correctly, the file will then automatically get the correct settings.
- E.g. a Media upload linked to a certain part will automatically associate the media file to that part in the project. Normally, you would have a Media upload job for each part/episode.
- The uploader can also select a conversion preset before submitting the upload form.
- If the workflow is set up correctly, the file will then automatically get the correct settings.
- As an automated upload job.
Media selection logic: what gets loaded into the editors?
When a job is opened in an online editing tool (such as Plint Subtitler), the system will look for the "best" media file to load into the player. The best media file is the one meeting these criteria:
- File mode is set to "Media" (see above)
- Most recently added/uploaded, and:
- Linked to the same Project (available to all parts, unless they have a "better" match)
- Linked to the same Part/Episode (overrides the above)
- Linked to the same language (overrides both of the above)
- The latter case is the most unusual, but if there is a need to provide alternative source media for different target languages, it is possible.
Media from Parent projects
If a Media file is set to "Visible to child projects", it can be loaded into the editor on jobs on child project as well. Apart from that, the same matching logic applies, mapping against with part/language. More information here.
Media time offset
If the starting time of the media should be offset, for example by 10 hours, this can be set for the file in various ways:
- From the Filezone
- Users with full project access can edit the properties of a single file, or batch edit the offset value for multiple files.
- From Media upload jobs
- The upload form contains a field for offsetting the media start time.
File versions and creation
A key concept with the online editing workflows is to minimise the need for file management. You can import a file into Plint Subtitler, for instance, but in an ideal workflow that's often not necessary.
The file, and its Milestones
When an online editing job is opened (i.e. a user clicks "Go to work"), the system will always look for an existing file linked to the same node (part/language) and project. If one is found, work can simply continue. Changes are saved automatically to the file on the server. The same file will be opened for every job in the same node, for example throughout a sequence of tasks including Translation, QC and Final review.
Every time a job changes status, a copy of the current state will be saved in an archive along with some information: job owner, time/date and – if added – a general comment. This state is called a Milestone and can be used in various ways (such as comparing versions with "Track changes"). However, it is the main file that will always be loaded when the editor is opened, and it is this one that will be exported: from the joblist, from the "Download subtitles" page and with the automatic file export tools.
Think of it as a single file moving between different stations or users. When you need to compare it, or revert it, the milestones are there – but the latest version is always found in the same place.
The file is a structured internal format (JSON) and may contain – besides subtitle clips with in and out times – reference text, comments, annotations, status and general formatting information.
Creating a new file
If no file is found, a new one will be created in one of two ways:
- A blank placeholder file
- This will contain a single clip and serves as a starting point for the translator.
- The translator may simply begin adding new clips and translations, originating from scratch, or the contents may be replaced by importing a subtitle file using the File menu.
- A file based on a template
- If a job is set to "Load template" and there is no previous file available, the system will look for a file connected to the parent job.
- The parent job is typically linked to an English-language node in the same part.
- All subtitle clips from this file, including timing information, will be automatically loaded into the editor.
- The text, however, will be copied into the reference text fields.
- This allows a translator to start adding translations into timed blocks, with constant access to the source text as a reference.
- If a job is set to "Load template" and there is no previous file available, the system will look for a file connected to the parent job.
Accessing/downloading backups
A user with sufficient privileges (Workbench, Manager) can download the previous versions from within Plint Subtitler. This is done from the "Track changes" window (Review / Track changes). After selecting a milestone/backup to compare to, select "Download JSON" to download a complete copy of the work file.

Files are independent after creation
Even if a file is created from a template, it becomes a stand-alone file after this point. Changes made to the original template will not be automatically reflected in the "child files".
Starting over
This may for example become necessary if translation jobs have begun based on an incorrect template.
As a Workbench or Manager user, you can Reset a job in Plint Subtitler. This will delete the existing file linked to the part and language. Depending on the two alternatives above (see "Creating a new file"), a blank file with a placeholder will be created, or one based on a template. (Any previously stored backup versions/milestones will, however, remain in the history.
Plint Subtitler manual
Plint Subtitler lets you subtitle from a timed template or originate subtitles directly from video in the browser.
https://docs.plint.com/books/plint-subtitler-online-manual
The Report tool: subtitling QC presets
Under Tools & Data / Report tool, administrators can specify QC rules that should be applied in Plint Subtitler's Report tool, for example Maximum characters per line or Characters per second. These rules support exceptions on language level, or language type level, and are grouped under profiles called Report tool presets. Matching rules to jobs works like this:
- When a Plint Subtitler job is opened, the editor first looks for a matching Report tool preset.
- This is a general profile containing more specific rules.
- Matching the preset is done based on Project data, such as Client company and Client keyword.
- These values can complement each other to fine-tune the matching further: for example two profiles for the same client company but with separate client keywords: "Trailers" and "Long-form".
- If no preset matches the Client company or Client keyword, the Default preset will be selected.
- Once the system knows which preset to use, it will check the current language of the job. For example, Japanese might allow only 20 characters per line, whereas German could allow 42. These exceptions can be language-specific or more general.
- The system will first look for a rule matching the specific language (best match).
- If none is found, it will look for a rule for the language type (RTL / Double-byte).
- Language types are specified when editing language data under Tools & Data
- Finally, the system will look for a General rule.
- If none is found, it will look for a rule for the language type (RTL / Double-byte).
- The system will first look for a rule matching the specific language (best match).
Rules
Note: For certain specifications, a single, general rule might suffice. For others (for example those related to number of characters), exceptions typically need to be made.
Status
There are two statuses, indicating the severity of what is reported.
- Use "Warning" for problems that the translator should be aware of but can ultimately decide whether or not to adjust.
- User "Error" for problems that need to be addressed before the job can be delivered.
Client-specific presets can be added

Within the scope of a preset, exceptions on language level can be made

Error types
The list of errors Plint Subtitler can look for is maintained here.
Please note that this list is continuously updated as new options are added.
Supported file output formats
From the JSON file stored during online editing in Plint, several deliverables can be automatically generated or downloaded from within the editor itself (depending on job settings). All formats are also available on the Download subtitles page. These are the currently supported formats:
- SRT
- EBU-TT (Standard/Streaming)
- TTML (Standard/Streaming)
- ASS
- TXT (Plain text with subtitle numbers, no timecode)
- CSV (Tab separated file with all data, including timecode with both frames and milliseconds)
In the case of SRT, plain text and CSV there are additional options when exporting, in order to meet different degrees of compatibility with formatting and positioning. This type of formatting can be kept or removed when exporting files from Plint. When all formatting is kept, the following may be included (if added during the editing process).
Text formatting tags (html)
- Italics
- <i>
- Bold
- <b>
- Underlined
- <u>
- Superscript
- <sup>
- Subscript
- <sub>
- Text color using span tags
- Example: <span style="color: rgb(208, 2, 27);">
Positioning/alignment codes
The most common example is raised text, but there a nine supported positions/alignments in all which can be selected when editing in Plint Subtitler. This information is not added as HTML tags but as codes on a separate line above the actual subtitle text in SRT files. Depending on the display app/system used, they may be shown either as visible codes onscreen, as intended (invisible but affecting text position) or ignored altogether.
- {\an8}
Top center = Raised - {\an7}
- Top left
- {\an9}
- Top right
- {\an4}
- Middle left
- {\an5}
- Middle center
- {\an6}
- Middle right
- {\an1}
- Left bottom
- {\an4}
- Left center
- {\an3}
- Right bottom
Sample files
The SRT examples below can be used to try these formatting settings in a system. The subtitle text describes their intended look.
File 1: text formatting
1
00:00:01,000 --> 00:00:04,001
Normal, unformatted text.
2
00:00:04,681 --> 00:00:07,681
<i>All text in italics.</i>
3
00:00:08,401 --> 00:00:11,401
A single <i>word</i> in italics.
4
00:00:11,801 --> 00:00:14,801
<b>This line in bold. </b>
<u>This line underlined. </u>
5
00:00:15,641 --> 00:00:18,641
This text has <sup>superscript </sup>and <sub>subscript</sub>
6
00:00:19,241 --> 00:00:22,241
<span style="color: rgb(208, 2, 27);">This line is in red.</span>
A word on this line is in <span style="color: rgb(74, 144, 226);">blue</span>
7
00:00:22,721 --> 00:00:25,721
{\an8}
This subtitle is raised
using the following code \an8.File 2: positioning codes
1
00:00:01,000 --> 00:00:03,001
{\an7}
Top left
positioned text
2
00:00:04,081 --> 00:00:07,081
{\an8}
Top center
positioned text
3
00:00:07,561 --> 00:00:10,561
{\an9}
Top right
positioned text
4
00:00:11,120 --> 00:00:14,120
{\an4}
Middle left
positioned text
5
00:00:14,641 --> 00:00:17,641
Middle center
positioned text
6
00:00:18,441 --> 00:00:21,441
{\an6}
Right middle
positioned text
7
00:00:22,201 --> 00:00:25,201
{\an1}
Left bottom
positioned text
8
00:00:25,881 --> 00:00:28,881
{\an4}
Left center
positioned text
9
00:00:29,481 --> 00:00:32,440
{\an3}
Right bottom
positioned text
10
00:00:33,400 --> 00:00:36,400
Unpositioned, unaligned text
11
00:00:37,080 --> 00:00:40,080
{\an8}
Raised textTips for project managers and admins
Once you understand the basics of project and jobs, it is a good idea to get familiar with the tools that will simplify your working day and boost efficiency and accuracy.
The project bar
A lot of your work as a project manager will start with the project bar.
(Please note that most of these tools are only available to Workbench/Manager users. Client users and Resources have a more limited number of options.)

Information
- General information
- An at-a-glance view showing project title, general status, ID, delivery date, project manager and client information
- Overall progress (the coloured bar)
- Progress is measured in completed jobs. If the bar is gray, there are no jobs linked to the project.
Icons
Each icon leads to a page or tool. Hovering over them will reveal a tooltip, matching the headers in the list below.
-
Project summary (the magnifier glass).
- A read-only view summarising the project.
-
Edit project data (the pen)
- There are two forms: a multi-tab form with all fields and a simplified view with the most commonly used fields.
- Depending on user settings, you may have access to either one, or both.
-
Job list (the hamburger icon)
- The page for managing all the jobs on the project. This is where you apply joblist templates, edit or batch edit the jobs and send out certain notifications.
-
Filezone (the documents icon)
- An area containing all files linked to the project.
-
Tree view (the flowchart icon)
- The Job list seen as a more intuitive overview, focusing on workflow.
-
Clone this project (two squares)
- Quickly create a copy of the project with all general data (not including jobs and files)
-
Create child project (the plus sign)
- Quickly create a project with this project as its parent.
- Note that the options in this form are limited by user data, for example in what target languages can be selected.
-
Project forum (the speech bubble)
- The place where everyone with a job on the project (including Resources) can communicate
-
Project milestones (the clock)
- Major operations on a project, such as batch editing and applying a joblist template, are preceeded by the automatic creation of a backup copy.
- These copies, called Project Milestones, can be found and restored here (use with caution).
- Please note that milestones are only stored for a week. If major changes need to be done after that, resetting the entire joblist is rarely the best course of action.
-
Download subtitles (the download icon)
- Batch download multiple files created in the Online editor, either in the work format or converted into deliverables.
-
Generate video copies (the camera)
- Use the built-in renderer to create video with burnt-in subtitles from the work done in the system
-
Project matrix tools (the hands)
- A "lab" where project matrices and joblist templates can be tried out on a project.
-
Messages (the inbox)
- Find all message threads linked to the project.
- This includes messages linked to individual jobs on the project.
-
Notes (the post-it)
- Find all notes linked to the project or its individual jobs.
Project filtering
As a project manager, you will often need to access different groups of projects. By filtering the Projects list and then storing the filter settings as named presets, you can quickly skip between lists.
Storing a filter as a named preset

Reusing the filter. Selecting it in the dropdown will apply it and reload the list immediately.

Project/job reports
Detailed data about projects and jobs can be collected and exported from Plint in the following way.

- Go to Projects and filter out the relevant projects first
- If all projects are relevant, you can show all, but please note that the more projects you have, the longer it will take the system to collect the data.
- Click "Report".
- Use the form to decide what kind of data you want to include in your report.
- If you are only interested in summaries, choose data from Project fields and job statistics.
- By adding Job fields, you can add detailed job data. Each job will be shown as an additional row in the report.
- You can also combine the data, for example showing the Project title with each job row. See example below.
- Click "Generate" to render the report
- If you often create reports with the same settings, you can store them as a named preset with "Save settings".
- Pro tip: by storing project filters and report settings you can save a lot of time on recurring reports. Use the project filter to quickly select the scope of the report and report preset to select how the data should be presented.
- If you want to export the result, the following formats are available: XML, CSV and XLSX.
Some examples
The following examples should give you an idea of what's possible.
Simple project report
For each project, show title and delivery date, plus the number of jobs. This will result in two report rows.

Result

Report including job details
By adding fields for the individual jobs on the projects, an extra row will be added per job. Click "Merge" to show project and job data on the same row. This will duplicate the project info on each job info row.
Please note that this can result in very big reports, since each project can contain hundreds of jobs.

Result

Finding jobs across multiple projects
Sometimes you need to find jobs that have certain criteria in common in a whole range of projects.
- Filter the Projects list under Projects
- Using stored filters can be very helpful here, if you need to quickly switch between different sets of projects
- Clicking "Find jobs" on the Projects page and enter search criteria
- This search will be performed across all the currently filtered projects
The result will be presented as a list of projects. Clicking on the title will take you to the project info page, and clicking on the number will take you to the joblist. (Please note that the joblist for the selected project will not be automatically filtered.)
1. Filter the projects and click Find jobs

2. Filter the jobs

3. Showing the result

The Calendar

The Calendar provides a customisable overview of what's going on. You can specify what to see by filtering the content. By saving Calendar filters, you can build alternative views to meet different needs in your working day. There are three types of content that can be displayed:
- Events
- This can be anything from a meeting to a holiday. Select "New event" to add one and specify its name, description, time and duration.
- The examples in dark blue below are events.
- Project deadlines
- Typically, these would be projects you are involved in.
- The examples in dark green below are project deadlines.
- Clicking on an item will take you to the project information page.
- Job delivery dates. These can be:
- Jobs assigned to you.
- Jobs matching the job filter.
- The examples in light blue below are job delivery dates.
- Clicking on an item will show a list of matching jobs for that specific time.
Customising your calendar view
When the Calendar filters are combined with Project filters and Job filters, they become an even more powerful tool. Some examples:
- Your basic todo list:
- By selecting "My projects" under Project deadlines and "My jobs" under Job deadlines, you can easily keep track of everything with your name on it.
- Projects based on a filter
- Under Project deadlines, you can select "Project filter" to quickly filter out a range of projects, based on any relevant data using a previously stored filter.
- Specific kinds of jobs
- If you select "Based on job filter" under Job deadlines, you can filter out jobs that meet certain criteria.
- You might, for example, only want to see what's going on with a certain type of job (like "Template creation"), or within a group of target languages.
- By combining a project filter (limiting which projects to view) with a joblist filter, you can create tailor-made views that meets your exact requirements.
- These views can be stored so that they are always conveniently available:
- Select "Save filter" to store your current settings as a named preset.
- Select "Load filter" to toggle between saved filters.
In the view below, a project manager has chosen to have a look at all current Proofing jobs within a certain set of target languages. This setting has also been stored as a preset named "Scandi proofing jobs".

"Selected jobs?"
Since there can be many matching jobs per day, they are grouped in sections named "Selected jobs". Clicking on such a section will open a dialogue showing all the jobs.

The Filezone
The Filezone is where (almost) all files linked to a project can be found, by users with Workbench or Manager access.
The exception is the JSON work files created by the online editing tools, since these belong more to the category data. These won't be found in the project Filezone. However, deliverables such as SRTs created from these files, will be found in the Filezone.
File modes
There are four basic modes which determine how a file behaves, or how it was delivered.
- Standard
- A file which can be downloaded and accessed from Plint but is not dedicated to any specific tool. Could be a dialogue list, could be a hi-res video file which is to be converted into editor-friendly format.
- This is what you get with File upload jobs, and the default setting when you just upload one or more files to the Filezone.
- Media
- A file meant to be opened in the Online editors.
- This is the mode you get when you upload a video using Media upload jobs.
- Online review
- This is the mode you get when you upload a video using Online review jobs
- Copy for delivery
- This is the mode you get when you generate a video using the built-in video rendering tools
File categories
In order to organize and categorize files in additional ways, you can use File categories. The list of available categories is maintained under Tools & Data. File upload jobs can then be set to require that the uploader specifies the category of the individual files. Files can then be filtered out in the Filezone based on category.
File visibility settings
Plint has several options to ensure that the right users have access to files. It is important to understand the following concepts:
- Visible on Files tab
- The Files tab belongs to the info page about Jobs. If a Resource user needs access to a file in order to do a Job, this is where it has show up.
- Visible to child projects
- Parent projects can contain files which are used across multiple projects. Read more here.
- Visible to Clients in Filezone
- Users with login type "Client" have access to a limited, simplified version of the Filezone for their orders. If they upload a file to that area, this setting will be automatically set to "Yes".
- If your clients access deliverables using the client Filezone, you need to ensure that this setting is on.
- The parent-child job rule
- A file uploaded to a job will automatically be visible to owners of child jobs. This is in order to streamline delivery workflows. A simple way of preventing files to become visible to child jobs is to insert a job in between.
Using the Filezone
Click the icon in the project bar to access the Filezone of a project. As a project can potentially contain thousands of files, the first section is dedicated to filtering. In the example below, filtering is done on filename.

- In order to edit the general properties of a file, click the "Pen" icon.
- Click the "Eye" icon for a preview.
- The built-in file viewer supports most audio and video format but is meant for quick checks, not advanced review or editing.
- The "Convert" icon is only shown for "Standard" files.
- It allows you to quickly access the built-in rendering tools and convert a file, for example a hi-res video file, into one suitable for the online editors.
- This will create a new version of the file, leaving the original intact.
- The media progress icon provides status information when files are being converted or automatically prepared for the online editor.
- Most media files are also scanned for metadata, such as resolution and framerate, which can be accessed by clicking the "Information" icon.
Editing a single file
(Please note that editing in this case means editing the information about files and how they are used in Plint.)
In a good workflow, editing the details of delivered files and media is usually not necessary as this is normally handled at the point of delivery. If you do need to link a file to a certain part or language, or change its visibility settings, click the pen icon. This form also offers a file preview.

Editing multiple files
You can also click the "Quick edit" button (perhaps after filtering the list) to edit the properties of multiple files in a single form. This mode does not support all kinds of information, however. Make your changes and click "Submit" to store them for all the files.

Batch editing in quick edit mode
If you want to apply the same setting to a large number of files, some properties can be batch edited. This functions is best understood when viewed as a help when quick editing files., This means that you first need to go into quick edit mode, which will give you access to the "Batch edit" button.

Select the files you want to affect (click the top checkbox to select all) and select the properties to change (for example "Visible on Files tab"). Confirm by clicking "Edit selected".
This will toggle settings for the selected files in the form. Now you can submit the form to store the settings.
Downloading files from the Filezone
You can download single files by just clicking the download icon in the list. If you need to download multiple files, you can also use the "Batch download" button, located above the list.

Please note that you will need to select which files to download. Click the top checkbox to select all visible files.

When you click "Download selected" the system will package all the files in a simple ZIP file and send it to the browser for download.
Sharing files across projects
If multiple projects require access same files, especially video/media, consider setting up a Parent project. The logic is simple, but the implementations can be varied.
- Create a parent project to hold the files
- Just a normal project, but you may want to name it something explanatory
- Create any number of child projects under this
- Selecting a parent project can be done when editing projects, using the "Parent project" dropdown
- Upload files to the parent project and set them to "Visible to child projects"
- This can be done directly in the Filezone
- or on File upload, if the job settings allow it
Any file can have the setting "Visible to child projects", but the behaviour depends on the File mode. For files set to "Media" this allows video to be loaded into the online editors in all child projects. This can save lots of storage and processing time as media files require being converted and prepared for editor use. Instead of running this process for duplicate files across multiple projects, you can do it once in the parent project.
If the File mode is "Standard" or "Copy for delivery", they will be made available for download. Other file settings will also be taken into account. For example, if you want to provide access to dialogue lists to users on all child projects, you would need to turn on both "Visible to child projects" and "Visible on Files Tab".
You should also note that the usual logic applies when it comes to nodes (parts and languages). The below file would for example be visible on the Files tab on jobs linked to part 1 on all child projects.

Extended functions for Clients and Resources
There are cases where you need to enable a certain guest user to do more.
- Client users with additional privileges can
- Edit/delete files in Filezone
- See the job tree
- Change assignee and status
- (only for jobs already assigned to someone within the company)
- See a complete list of users from the same company
- including target language and job types
- Resource users with additional privileges can
- Place orders in a simplified form and upload files to it
- They can only see their own orders, but all orders are visible to client users from the same company
- Place orders in a simplified form and upload files to it
Project defaults
Often, a client will place orders with the same target languages. There are several ways of avoiding having to type in the same or similar data every time you create a new project. One way is to simply clone a previous project, but this will require you to make sure that no old data is relevant. Using Project defaults, you can start from scratch but still fill in the target languages quickly.
Storing project defaults
Under Tools & Data / Project defaults, you can create and edit defaults. A default is linked to either a Client keyword (sometimes called a "Brand") or a Production (typically a TV series). In this case, we are editing the defaults for a Sample Corporation. Please note that aside from the target language itself, additional data can be stored – such as tags.

Applying project defaults
- Use the Simple project form to create or edit a project.
- Make sure it has either a Client keyword or a Production.
- Select "Load defaults"

The values to be inserted will be shown in a preview. Click "Load defaults" to confirm.

The stored values have now been inserted in the Target section at the bottom of the form (replacing any previously selected values).

Notifications about system events
When editing user data, you can specify which events in the system should result in a notification email to this user. They are mainly relevant for Workbench and Manager users, but can also be applied to client contacts.
Please note that certain other events always result in email notifications.
Job deadlines
This is the only setting which can be specified for any user, by themselves. The same option is available under the Account menu / Profile & settings.

To set the other notifications, you need access to the Advanced edit form for People. Such as:
Completed jobs
Selecting one or more job types that represent significant steps in a project, for any language or all, can be valuable for a project manager and help them keep tabs of a project without being inundated with notifications for each event. You can also limit the projects for which the user is notified.

New orders / projects
Be the first to know when a new order arrives, either by a Client user representing a company or by a project manager creating a new project. For a client contact tasked with keeping track of all activity for their company, the same setting but with the "Linked company" option can notify them when a colleague places an order.

System timezone
 The time for system events like messages and support questions is always stored as UTC. Setting a System timezone under Tools & Data can affect how times are shown in the system.
- The selected timezone will be shown as a clock on the Dashboard and in the top menu, along with the timezone label.
- Simply put: this clarifies to all users ”what we mean when we say 12 o’clock”
- The time for events like messages and support questions will be converted from UTC into this time and shown with the timezone label.
- E.g. 2020-02-20 10:10:10 CET
- The selected time for job deadlines will shown as stored but together with the timezone label as a clarification.
- This includes the job info page (see pic), jobs shown on the Dashboard and in the joblist.
Job info page. Deadline is shown with system timezone set to CET.

Finding People by what they've worked on
Besides data directly linked to People/users (target languages, job types, tags, etc ...), Plint can also search on previous or current work. This is done by specifying projects (with the option "Working on") and, optionally, job types on those projects ("With what"). Se example below.

Storing and reusing People filters
A combo like this can be stored as a filter. If it's a global filter, it can be even be used as criteria for assigning new work.
Storing a "Global" filter (for everyone)

Using the filter as a job criteria

Downloading converted subtitles as a batch
Once a subtitling job has been started, there is a work file in Plint (JSON) which is used throughout the process. This file can be exported into a number of formats, for example within the editor or as an automated job. It can also be used "ad hoc".
In order to download multiple subtitles from the same project, at any point in time, just go to the Download subtitles page for the project. At the top of the page, first select a format, such as SRT or TTML. This will cause all downloaded files to first be converted into that format and packaged in a zip file.
You can then select to download just a single file (click on the corresponding cell), all files within a part or language, or all files on the project. As a final step you will get the option to only download files where one or more jobs are done.

Additional security
Plint Subtitler
Visible watermark
To discourage screen capture and similar activity, a visible watermark can be superimposed on the Plint Subtitler monitor. This is activated on the Editor settings tab when editing Job properties. The watermark includes user name and IP number.

Login / authentication
Duo
Two-factor authentication using Duo is supported, but needs to enabled for the site. If this is set, this requirement can be set on user level when editing People data with the Advanced form.

Azure AD
Azure AD can be implemented for SSO across the entire site. In this case, the Plint login screen will be replaced with a Microsoft login screen.
Sharing files with external users
Each project has a Share page, which can be used if needed. You can get the link to it by going to the Filezone and clicking "Get link to share page". This link contains the address/URL to the page and a unique token which works as the password. Send this link to anyone who needs access to the files.

Which files are available on this page?
All files with the setting "Visible on file share page". The easiest way to select files is to click "Quick edit" in the Filezone. To simplify this, you can filter the Filezone first, for example only showing files with a certain extension or file mode.

What does the page look like?
For a user accessing the page, this is how it looks. Clicking on a file link starts a regular browser download. Right-clicking on a file link allows you to select the destination before downloading.

For how long is the link valid?
When the "Get link" button is first clicked, the token is created, with a seven day lifespan. If the link expires while still needed, you can extend the lifespan by seven more days by simply going to the Filezone for the project in question and clicking this button again.
What if I share the wrong file?
There is a risk of sharing a file which shouldn't be shared, as with any file sharing tool, but mistakes can be fixed easily. The solution is to uncheck the option "Visible on file share page" for the file. The next time the page is loaded by any user, the erring file will no longer be visible there.
Take care when sharing the link to the page, and inform users and clients that whomever they share it with will get equal access.
Handling changes in a subtitling template in mid-workflow (Reset job + Load translations)
It's a familiar problem: after translation has begun, a new version of the media is delivered. Perhaps a recut, perhaps some major errors in the template were discovered. Updating the template is one thing, but what if five or twenty languages already have half-finished, or even complete, translations? Here is one way of handling this, aimed at minimising the need to retranslate text.
It is assumed that translations are done using Plint Subtitler based on a template. This method will also work much better if a minimum of splitting and merging have been done in the individual target languages.
1. Update the template first
Leave it to a single person to incorporate the timing changes, add new blocks where needed and move blocks around where necessary. The simplest way of doing this is to use the same job as the one where the original template was created, but you can create separate jobs for this – as long as they are in the same part and language node.
2. Notify translators to "Reset and Reload"
The idea is to store away your current work where the system can easily find it and then load the new template. This is exactly what the "Reset job" button on the "Job details" tab in Plint Subtitler does.

When the job is reset, the latest template version will be loaded. Perfect, except all the translations are gone. Now it's time to click "Load translations".
This will open a dialogue with some options. Usually, you only need to select a "File to load", typically the top one. This is a snapshot automatically created when the job was reset. The snapshot is a complete backup containing both the reference text and the translations. Click "Confirm" to load these translations.

The system will now compare all text in the new template against the reference text in the snapshot. For all exact matches, the translation will be automatically inserted in the text field. Now, you only have to fill in the blanks, for example new blocks or blocks where the reference text has for some reason been changed.
Notes
- By now, it should be obvious why splitting and merging the translations will causes issues in combination with this feature.
- Tip: the "Limit editing" option for jobs will prevent all such changes.
- Make sure to use "Reset job" on the right job, i.e. a job with the "Load template" option active.
- Otherwise, the old file will be removed but the new template will not be loaded.
Reusing translations within the same project (Load translations)
The functionality which enables updating a template in mid-project can also be used to import translations from other jobs on the same project. It might be described as a simple, built-in translation memory.
Use cases include (but are not limited to):
- Importing text from from a similar language or language version as the starting point of your translation
- Importing completed translations from another part/episode on the same project
- Recurring strings ("Previously on ...")
- Different edits of the same programme
Requirements
- This function relies entirely on finding subtitles/blocks with the same reference text
- Making it ideal for locked-template workflows
- With the right job settings, users can select other translations on the same project and import text from them
An example
- In the project below, work is completed on the Swedish translation in Part 1. The subsequent Spot QC job is also done (screenshot 1).
- Part 2 has a completed English template with many identical strings.
- The job settings for the "Subtitling from template" job in Part 2 allow importing subtitles from translations where all jobs are done (screenshot 2)
- When the owner of this job goes to Job details / Load translations in Plint Subtitler (screenshot 3), they can choose from translations where all jobs are done (screenshot 4). In this case, this means Swedish translations from part 1.
- (You can also allow import of subtitles from translations that are still in process, for example before the final QC is done. The right choice depends on your workflow.)
1

2

Pro tip: With the setting below, you can make any job the "completion job" by adding any tag to it. The translation in this part/language will be considered ready for import and reuse when a tagged job within that node is Done.

3

4


Removing jobs in the middle of a workflow
New function Dec 2023
Adding jobs to a workflow has always been easy in Plint Core, removing them without breaking the sequence of jobs less so. The inconspicuous option "Reparent" in the batch edit form solves this problem.
A workflow where the project manager wants to remove all "Spot QC" jobs. Without having to manually fix the parenting.

Go into Batch edit mode and select which jobs to remove. Select "Delete jobs" and check the "Reparent" option.

Submit and confirm

Check the result

Job fees
Built-in tools for automatically calculating job fees based on project data.
Custom fees
The most basic form of fee calculation is to simply specify a fee and a currency for each job. This can also be done through batch editing or even setting the fee in advance in a joblist template.
Also note that when a Resource matrix is used, and a job is accepted or grabbed by a user, the calculated fee will automatically be converted into a Custom fee and stored for that job.

Calculating Job fees with a Resource matrix
Resource matrices use the same basic idea as Price groups, but they have a number of advantages.
- Like Price groups, they depend on Job type and Number of units for calculating the fee
- But they also support multiple currencies and exceptions on language level
When are they used?
When the job's price calculation is set to "Use Resource Matrix", as shown below. (Like all job settings, this can be preset using a joblist template).

Creating/editing a Resource matrix
- Go to Tools & Data / Project matrices
- Select the Resource matrix tab
- Edit or create new?
- To simplify admin work, strive to create as few matrices as possible. Remember that multiple currencies and exceptions for different languages can be handled within a single matrix.
- Add a specification for each relevant job type, unit type and currency.
- I.e., only add the combinations you actually use. You can always add more specifications later on, when new target languages, currencies, units or job types come into play.
Specification types and how they complement each other
There are three types of specification:

- Fee
- This type is multiplied with the number of units
- E.g. "10 USD per Minute"
- This type is multiplied with the number of units
- Static fee
- For jobs where number of units aren't relevant, or for starting fees.
- You can combine Fee and Static fee
- E.g. "100 USD (Static) + 10 USD per minute (Fee)"
- Minimum fee
- These are used to ensure that small jobs are also paid a worthy salary.
- If the unit-based fee doesn't reach this number, the Minimum fee is used
- If it does, the Minimum fee is ignored. It's job is done, so to speak.
- E.g.
- The Minimum fee is 100 USD, the Fee per minute is 10 USD
- For a 1-minute film, or 5-minute film, the fee is 10 USD
- For an 11-minute film, the fee is 110 USD
- The Minimum fee is 100 USD, the Fee per minute is 10 USD
- These are used to ensure that small jobs are also paid a worthy salary.
Finding the right matrix and specification
- Calculating the fee for a job starts by determining which matrix to use
- If a Resource matrix has been selected for the project, it will automatically be used for all jobs on that project
- If not, Plint will look for the "System default" matrix
- There can be only one. There is a checkbox for it.
- If neither can be found, the calculation will fail
- Within the selected matrix, the system will then look for the right specification, based on the following:
- What's the job type?
- What's the number of units?
- This information comes from the part which the job is connected to
- What unit type is used?
- Minutes? Words? This is determined by the project (on the Price & Internal information tab)
- What is the language?
- Here, a hierarchy is used:
- Is there a specification for the language in question?
- This is typically used for exceptions. If all languages have the same fee, go with a "General rule" (see below)
- If not, is there a specification for the Language group?
- A middle ground between general and specific, language groups can bundle together selected languages and a fee can be specified for the whole group. E.g. "Nordic languages"
- If not, is there a "General rule"?
- This often serves as a catch-all to cover all languages with the same fee
- What currency should the fee be calculated in?
- If the project allows and there is a "Default currency" specified for the user, it will be used
- If the project is set to "Force currency" on the other hand, the currency used for the Client fee will also be used for all jobs.
- If neither is specified, the Base currency will be used
- Yes, there can be only one, and yes, there is a checkbox for it
- If there isn't even a Base currency, the Main system currency will be used as the default
- If the project allows and there is a "Default currency" specified for the user, it will be used
Adding an exception for a certain language after specifying default fees in two currencies:

Applying fees and making them static
One strength of Resource matrix fees is that they are dynamic and can offer fees in different currencies depending on user preferences. However, once a job has been accepted or self-assigned, you typically want this fee to become static. The system is also designed in this way.
- User A sees an offered job on their Dashboard
- User A has USD as default currency, and their is a specification for this currency
- User A confirms the job by selecting Reply / Yes
- The fee is now automatically stored as a Custom fee for this job and is after this point no longer affected by changes in the matrix, project or any other external factor
Currency conversion
Besides adding multiple fee specifications, there is another way to add support in multiple currencies. It requires certain settings on site level, under Tools & Data / Currencies.
- Select a "Base currency"
- This is the only currency you need to add specifications in.
- It will also serve as the default for all users who don't have a default currency.
- For the currency you want to convert fees into:
- Select "Allow automatic conversion"
- Make sure there is a currency rate specified.
The following example explains how it works:
- User A sees a job offer or a job in the Job tank.
- User A has default currency USD
- If there is no specification in USD for the job type and unit:
- the system checks for a specification in the Base currency
- if one is found, this fee is converted into USD based on the currency rates
- this fee is shown to the user
- If the user grabs or accepts this job, the converted fee and currency are stored for the job
- The job history will also show that the fee was converted
Adjusting the fee with a percentage value
When multiple currencies can be used, specifying a change in the fee can be tricky. The field "Price adjustment (%)" can solve this. It will adjust the fee by a percentage once it has been calculated into the correct currency.
Tip: Negative values can be used to lower the fee.

Forcing exceptions after jobs have been grabbed or confirmed
In the real world, the example above is sometimes problematic. What if the running time of an episode is updated in the project data after work has begun, and the fee of a hundred already assigned jobs needs to be updated? Or perhaps the fees have recently been updated in the matrix itself and these jobs ought to have been included? Luckily, there is a tool for that.
- In the joblist, filter out the jobs you want to update
- Go to Batch edit / Calculate job fees
- In many cases, you can now simply click Recalculate
- This will redo the calculation for the selected jobs, based on the new data
- By default, unassigned jobs will be excluded. Their fees haven't already been converted into static fees, so it makes sense to keep them dynamic. You can include them as well, however, by simply unchecking the checkbox.
Finding the "Calculate job fees" option

Calculate job fees again

Troubleshooting: when calculation fails
If a single required piece of information is missing for the job, user or project, the whole calculation will fail. Here are some tips for spotting the problem.
-
- The "Job fee" tab, found when editing a job, will usually give you a clue about what's missing.
- See screenshot below
- You can also look at the job info page itself.
- E.g. A certain user is offered a job. The user's default currency is USD. There are only specifications in EUR. No fee can be calculated for this user.
- Possible solutions:
- enable currency conversion for USD
- add a specification in USD
- force the project to use EUR for all jobs
- manually calculate the fee for the job, if this is a rare exception, and store it as a Custom fee
- The "Job fee" tab, found when editing a job, will usually give you a clue about what's missing.

Price groups ("the old way")
Price groups offer a basic way of linking job fees to job types. The logic is quite simple:
- For relevant Job types and Units, you specify a fee
- See screenshot below
- The fee is then automatically calculated based on, for example, the running time of the part

How to use
- Create a Price group (under Tools & Data / Price groups)
- This is the unchanging unit which you can connect to users
- Add at least one price list to the price group
- By using price groups, you can update the fees over time and specify a point in time when the new fees are used.
- The jobs, as a consequence, need a Delivery date in order for the fee to be calculated
- Attach Price groups to users/people
- Here, as well, you can specify a date. These dates allow you to swap price groups for users over time without affecting the fees of old jobs.
- Specify that the jobs should use this form of calculation
- This is done on the "Job fee" tab, under Price list calculation:
- "Use project data" will combine project data such as the number of units for the part with a price group
- "Use specifications" will let you specify, for example, a different number of units, but still make use of a price group.
- Example: the running time of the part is 100 minutes, but the freelancer only translated half of it.
- This is done on the "Job fee" tab, under Price list calculation:
Limitations
- A price group only supports a single currency
- Exceptions cannot be made for different target languages
- Prices remain dynamic even after jobs are accepted or grabbed
- All of these issues are addressed by using a Resource matrix instead.
Tools & Data (advanced settings)
Important tools and options which can be configured in Plint under Tools & Data.
Using FFMPEG to generate video in Plint
Short summary
- There are two types of FFMPEG presets that can be created in Plint:
- "Work copy" is intended for proxies and "Deliverable" is for, well, deliverables.
- Depending on the type, they will become available in different Plint features
- When executing a Media Upload job, the "Work copy" presets can be selected
- When generating video with burnt-in subtitles, the "Deliverable" presets become available
- Presets are created under Tools & Data / FFMPEG / Presets
- Ongoing render tasks can be followed under Tools & Data / Media processing / Renders
- Here, tasks can also be cancelled or their priority changed.
"Hardsubbing" / adding burnt-in subtitles to video
Plint can combine a source video file from a project with the translations/subtitles created in the system to create deliverables; videos with burnt-in subtitles. This is done from the "Generate video copies" page or as an automatic job. In both cases, a FFMPEG preset is needed. These are handled under Tools & Data.
Here are some pointers on the available variables.
- When FFMPEG is used to render video copies, the source media and subtitles are inserted automatically, as long as they are present in the project. Examples:
- Source video: A video file with "Standard" mode
- Subtitles: a work file linked to the node in question
- For example: if an FFMPEG rendering job is started in the German node of Part 2, Plint will look for a JSON file in the same node. A "Standard" video file linked to the same Part, if found, will be automatically used. If there are multiple Standard files for the same part, the newest one will be used.
- You can add more parameters for things such as video format and resolution.
- The Parameters field is used for all FFMPEG settings except font settings. Example:
-vf scale=w=1334:h=-1,"{SUBTITLE}" -c:v libx264 -preset medium -crf 23 -c:a aac -b:a 320k -y
- {SUBTITLE} is the path to the subtitle file and is inserted in the preset as a dynamic variable. The system will insert the correct path when the preset is used.
- Audio is set to AAC, 320k with the parameters after -c:a.
- When making copies with burnt-in subtitles, the font settings can be specified with the "Font styles" field.E.g.
- FontSize=24
Advanced font settings
FontSize=32,OutlineColour=&H66000000,BorderStyle=3,PrimaryColour=&H000000FF
- In PrimaryColour the H00 is the alpha (transparency). H00 is fully opaque, and FF (ie. 255 in decimal) is fully transparent/invisible.
- The 0000FF in the example is a hexadecimal to set the color. In this case it is bright red. Note that it is in the opposite order of HTML colors (red would be FF0000 in HTML).
(Please note that the syntax is different when using the ASS subtitle format, which yields additional options.)
Font size
Setting the font size will specify a relative size. The subtitles will be scaled based on the resolution of the video. Values around 20 are fairly "normal".
Changing the default font
The fallback font for rendering videos with burnt-in subtitles is "Arial Unicode MS". You can upload any TTF through Plint and use that instead. This is how:
- Fonts are uploaded under Tools & Data / Fonts
- make sure to spell the name exactly as the official font name
- If you want to use this font across all projects, set it as System default.
- When you render video copies with burnt-in subtitles from the "Generate video copies" page, the selected font will automatically be used.
Interlace / progressive output
If video should not be deinterlaced (for television, for example), additional flags can prevent this. See example below
-vf "{SUBTITLE}" -c:v libx264 -flags +ildct+ilme
Complex filters / adding logo
Using "filter_complex", multiple inputs can be combined. This will overlay a logo in the top left corner (with 20 pixels margin) plus burnt-in subtitles.
-i path-to-logo/logo.png -filter_complex "{SUBTITLE},overlay=20:20"
Work copies with timecode
FFMPEG can also be used to generate work copies, for example MP4 files suitable for the online editor. These presets need to be tagged as "Work copy" under "Usage". This will make them available for automatic use for "Media upload" jobs. All you need to do is select a media for upload and select a preset in the conversion dropdown. The system will create the work copy and tag it for use in the online editor.
The following parameters will generate a lo-res file with visible timecode. Audio is set to AAC, 128k.
-vf scale=w=480:h=-2,"drawtext=fontfile={FONT}: timecode=\\'00:00:00:00\\': r={FRAMERATE}: x=(w-tw)/2: y=10: fontsize=20: fontcolor=white: box=1: boxcolor=0x00000099" -keyint_min 1 -bf 16 -c:v libx264 -preset slow -crf 25 -c:a aac -b:a 128k -y
- Note that the timecode section needs to be escaped.
- Also note that the font settings used with the drawtext option are not the same as the "font styles" options used when burning in subtitles.
Some explanations
- -keyint_min 1
- Sets every frame to be a keyframe. Better response in editor but bigger file size.
- libx264
- set format h264
- crf
- compression rate, suitable values may differ for different formats
- 23 is "normal" for h264
- r=25
- framerate for burnt-in timecode
- -vsync "cfr"
- ensure constant framerate
Documentation and examples of FFMPEG settings
- FFMPEG offical site: https://ffmpeg.org
- FFMPEG An intermediate guide (Wiki): https://en.wikibooks.org/wiki/FFMPEG_An_Intermediate_Guide
- FFmpeg Utilities Documentation (common colour codes, resolutions, etc): https://ffmpeg.org/ffmpeg-utils.html
- Useful examples: http://www.catswhocode.com/blog/19-ffmpeg-commands-for-all-need
Connection profiles
Under Tools & data you can configure “Connection profiles”. A connection profile is a way to incorporate external storages in your workflows. Plint currently supports FTP, SFTP and Amazon S3. Profiles can be used both in the delivery of assets and ingest.

Webhooks
Webhooks is a way to create callbacks with a custom payload to notify event changes in Plint. We currently support webhooks on job level with a status change or change of date as a trigger. The JSON payload can be customized and content dynamic using variables such as: "name": {{JOB_TYPE_NAME}},

API Clients
Under Tools & data you can configure “API clients”. The client and secret can then be used to generate tokens when using the API.
With our REST API you can create and update projects. You can also get information about projects and jobs.

Walkthrough: a typical subtitling project
Explains common tasks and workflows with examples and screenshots.
Quick summary
The basics steps are:
- Setting up the project
- Applying a joblist template to build the workflow
- Assigning work, or confirming automatic assignments
- Notifying assigned users and requesting confirmation
- Making media and files available
- Preparing a timed template
- Translating from the template into additional languages
- Proofing and QC work
- Delivery
A typical subtitling project, as seen in the Tree view. After media is uploaded and verified, the time-coded template is created and reviewed. This is followed by translation into subsequent languages, based on the template, with a review/QC job for each translation.

Setting up the project
Under Projects, using the advanced or simple form, a project manager creates a new project, typically specifying:
- Source language
- Target language(s)
- This is also the time to select a "First" language, often English
- This language will be used to create the timed template which facilitates translation into the other languages
- Number of parts/episodes
- And any relevant individual specifications, such as running time, part name, etc
- Project deadline
- When is the whole project due
Simple project form. The main data such as title and deadline is added in the top section.

Specify parts information. (By updating the "Number of parts" value, you get additional lines.)

Select all target languages and specify which is "first".

Besides this data, there are numerous other fields that can be used to provide additional information.
Applying a joblist template
Once the project is in place, a joblist template is selected and applied to the project, creating the necessary jobs that need to be done in order to complete the project.
Click the "Job list" icon in the project bar of the newly created project.
![]()
On the joblist page, click "Template" and select a joblist template. (Generic example templates are included, but you would normally have a tailor-made template ready before this step.)

After the template is applied, jobs have been added to the project structure. Depending on the settings for each rule in the joblist template, they may already be assigned to users.

Assigning work or verifying automatic selections
Joblist templates can be set up to automatically assign the created jobs based on criteria. They can also be made to simply store the criteria with each job, to make assignment easier later. In some cases, you may want to override all criteria and simply select users for some or all jobs.
The starting point in all these cases is usually the joblist. View the pre-assigned jobs, fill in the blanks, adjust where necessary, until relevant jobs have someone to do them.
(Of course, in a perfectly set up system where all relevant information is available for all users, no visual confirmation is necessary and the assigned users can simply be notified.)
Notifying users / requesting job confirmation
Jobs, especially outsourced ones, typically require confirmation by the assigned user. Regardless of whether they have been selected automatically by the system or manually by the project manager, there are tools for notifying the selected users right from the joblist.
Under emails, select the relevant notification options. They are similar in use, but made for different scenarios.
- Confirmation emails are sent to users who have been assigned one or more jobs that have the status "Awaiting confirmation".
- Job tank emails are sent to all users matching the job criteria for one or more jobs that have the "Job tank" option set to Yes.
- (In both cases, only one email is sent to each user, summarising all the information.)

At this point, the workflow is all set up and relevant users have been notified. However, there may still be work to do for the project manager before work can actually begin. Read more under "Handling project media".
Uploading source media
The starting point for most subtitling projects is one or more videos. Once a joblist has been created in Plint, the next step is often to make this media available to the online editor and other tools. The goal is to eliminate the need for any manual file handling by freelancers and other users. A job with Delivery method "Media upload" is a simple solution for accomplishing this. Please note that this is the most basic method and requires some manual action, usually from a project manager. Media can also be made available to the system through automated means and integration.
Read more about media logic and the technical aspects here.
Using the "Media upload" job
This is often the first job in a joblist, meaning it has no dependencies on other jobs and can be done as soon as the media itself is available. It is typically assigned to a project manager (but may be performed by anyone with an account, including Resource users). Select "Upload media" on the Dashboard to start.

Click the dropzone to browse for the file on your local computer or network (or just drop the file on it). Please note that only one file can be uploaded with this delivery method. With a correctly set up project and template, this means that the file will then be automatically linked to the correct project and part.

Once a file has been selected, you will get some additional options before submitting the form.
- "Visible on Files tab" means that a user who is assigned a job on this part will be able to download the source media.
- This is useful when offline work is required, but make sure this is acceptable to the content owner.
- "Convert after upload" will use a preset to prepare the file for online editing work.
- This typically means scaling down the video to a resolution and compression level suitable for the online editor.
- It may also involve burning in visible timecode.
- Presets can be edited under Tools & Data but require some knowledge.
- "Timecode start time" allows you to tell the editors to offset the starting time.
- For example when the media starts at 10:00:00:00 and this needs to be adhered to throughout the localization process.
- Finally, you can choose to be notified by email when the conversion is done. There are two main steps:
- Basic conversion into editor-friendly format (using a preset from the dropdown)
- Optional. If the video already has a proper resolution and format, this step may be skipped, by simply not choosing a conversion preset.
- Additional media preparation for the subtitle editor. These steps start automatically, may take a while and include:
- Finding shot changes in the video and adding markers and thumbnails
- Creating visible waveform of the audio
- If activated for the site, DRM protection
- Basic conversion into editor-friendly format (using a preset from the dropdown)

You can follow the progress of these steps:
- In the project Filezone
- Under Tools & Data / Renders
Finally, after upload, a "Verify media" job may be waiting for you on the Dashboard. This is to ensure that the media will work with the online editor. Please note that processing the file may take some time.

Other files
If there are additional files that may be of use to people working on the project, the simplest way is to upload them to the project Filezone and then edit their visibility setting. For example, dialogue lists may be of value to people working on a specific episode whereas a glossary might be useful to everyone.
Creating a time-coded template
Once the workflow is in place and media is uploaded and prepared for the online editors, a time-coded template is typically created. This can be done by an external freelancer or as an in-house job. It will facilitate translation into any number of additional languages by providing properly placed clips/blocks as well as a reference text. For this reason, the template is often in English, even if the actual source language of the content is another.
A template can be created offline in a number of editing applications and then imported into the system, but Plint subtitler has all the necessary tools to complete this job online.
For a detailed guide to Plint Subtitler, go here.
For a video walkthrough of origination/time-coding, go here.
Keep in mind
- Make sure the template follows all technical rules and is thoroughly checked for mis-hears and incorrect details, as any errors may be inherited by consecutive languages.
- Comments on clip level will only be visible to people working on the same file.
- Whereas Script annotations will be visible for translators and can be used to explain concepts and provide tips for translators.
An example view of the Plint Subtitler

Script annotations can be used to help translators

Once the timed template is complete, the user selects "Change status" to hand over to the next job in in line. This may be a proofing/QC job done by a project manager or freelancer, or the workflow may be set up to allow translation to begin as the very next step.
Subtitling from template
Time-coding subtitles is a complex task requiring skill and special training. By populating the editor with time-coded blocks along with reference text, translators can focus on the text itself. This is called, among other things, "Subtitling from template" or "Second translation".
For a detailed guide to Plint Subtitler, go here.
For a video introduction to subtitling from template, go here.
When the translator clicks "Go to work", the file will be created/opened automatically in the editor. The work of the translator consists of filling the text fields with translations that adhere to the rules for the job type and language. The editor, if properly set up, will warn the user when rules are broken.
A job set to "Load template". Subtitles are loaded automatically from the parent job, but with the text copied to the read-only reference text fields. The translator enters text into the black boxes.

Changes are saved automatically at regular intervals. Hitting CTRL + s will save manually.
Using the built-in checking tools
Plint Subtitler comes with built-in tools to help ensure the subtitles are of good quality before signoff. These include:
Changing status
Once translation is complete, the user selects "Change status" to hand over to the next job in in line. Depending on job settings, this phase may include additional steps to confirm that a spell check and/or technical check have been completed.
Once you have gone through those panes, you can click "Change status" to mark the job as Done.

Proofing and QC work
Often, the translation step is followed by some kind of review step, sometimes called QC, as in quality check/control. This could be done by another external resource, a project manager or a client representative. There are also built-in tools allowing the translator to perform a language and technical check in the editor before signing off. In this example, another freelancer is assigned a QC job.
Checking the translation in the editor
Click the "Go to work" button on the Dashboard to get started. The QC job uses the same editor, but additional tools may be used/activated.
Adding comments
Whether you are requesting changes to be made or have made the change yourself, adding a comment is often very useful. Comments can be added (and replied to) for individual clips/subtitles.

Comparing versions / Track changes
If the job settings allow, you can compare the current version of the translation with previous versions. Select Review / Track changes to open this window.

Returning a job for adjustments
If changes are to be done (or confirmed) by the person who did the original translation, the QC job should be set to "Proofing-type". This means that when the QC person changes status, they will get the option to approve or not approve the translation.

Selecting "No" will set the parent job (the "Subtitling from template" job in this case) to status "Awaiting corrections". It is in effect the same as "In process", but with a different label on the Dashboard to clarify that this is an old job that has been reopened for more work. The user will also get an automatic email notification.
Deliverables
Once a subtitle/translation is completed and has gone through all review/QC steps in the workflow, it needs to go somewhere. Here are a few possibilities.
- Automatically create subtitles in industry standard formats using an automatic job.
- A job like this can be pre-specified to run for each completed subtitle, as soon as they are done.
- The resulting files can be batch downloaded from the project Filezone by a project manager for further distribution.
- With the right settings, Client users with access to the project could download it themselves after logging in.
- You can also let the system create download jobs, assigned to selected users.
- Another automatic job can deliver the files to an external resource, such as an S3 bucket or FTP server.
- Downloading one or more files from the "Download subtitles" page.
- This solution will always include the latest changes.
- In some cases, the most convenient solution may be to simply export the file from the editor itself.
- What formats are available for export may depend on job settings.
- You can also download the JSON work files from the project, assuming there is a way of parsing/using them outside of Plint.
Release log
Here's where you find information about additions, fixes and improvements to Plint Core.
2021-09-28
Highlights in this release
Shark tank - Sort on most urgent job (KERNEL-752)
In order to help resources find the most urgent assignments, the Shark tank now shows the jobs with the nearest deadline at the top of the list.
Auto upload changes (KERNEL-757)
The Auto upload delivery method, which fetches external files into Plint, has been rewritten to improve performance, especially when there are a multitude of waiting jobs.
Change batch quicklink export to tab separated (NETFLIX-382)
When copying multiple quicklinks from the window on the joblist page, you will now get them as a tab separated structure. This means that, for example, pasting them into Excel will result in orderly columns.
Order API improvements (KERNEL-782, KERNEL-783, KERNEL-784, KERNEL-709, KERNEL-779)
The order API now supports additional data, such as target languages and tags.
Bug fixes and minor improvements
-
Project report: data misplaced in wrong column when using XLSX (KERNEL-583)
- Sometimes, the total job fee for individual currencies could end up in an incorrect column when exporting a project report as XLSX. Now fixed.
- Invoice unit not stored when placing an order with client form (KERNEL-742)
- Client orders with an alternative invoice unit are now stored correctly
- Allowed tags lost on SRT export (KERNEL-773)
- When exporting/auto-creating subtitles as SRT, the sub, sup and span tags were removed even with the option "Keep all formatting". Now fixed.
- Client order placement fails without explanation if Company (and site) does not have a default currency (KERNEL-771)
- Under certain circumstances, client order placement would fail without explanation. Explanation now added.
Various bug fixes and minor improvements
- PTF-377, PTF-339, PTF-346, PTF-396, PTF-415, PTF-402, PTF-403, PTF-412, PTF-445, PTF-311
- KERNEL-786, KERNEL-788, KERNEL-820, KERNEL-819, KERNEL-773, KERNEL-826, KERNEL-827, KERNEL-769
2021-09-30 Hotfix
Resource Matrix - Minimum fee overrides unit based fees (KERNEL-850)
2021-10-12
Highlights in this release
Project - Sort forum posts in descending order according to date (KERNEL-778)
In order to help users find the most recent posts in project forums, the ordering logic has been improved.
People filter intact after adding more columns (KERNEL-836)
Project managers rejoice: when using the filter functions under "People", you can add more columns to show. Previously, adding a column would clear the filter, loading all users. This has now been changed.

Interface improvement when editing user tags under People (KERNEL-790)

Bug fix: FFMPEG presets can't be saved (PTF-448)
A big, recent framework upgrade created a bug when editing FFMPEG presets under Tools & Data, preventing changes from being stored when submitting the form. Now fixed.
Bug fix: Numbers in the Filezone page (PTF-447)
The same upgrade added strings to the upload date shown for files in project Filezones (e.g. "000000Z"). These have now been removed.
Full list of improvements and additions
- KERNEL-778, KERNEL-807, KERNEL-849, KERNEL-817, KERNEL-855, NUTXTWEB-357, NUTXTWEB-358, NETFLIX-427, KERNEL-854, KERNEL-837
Full list of fixes
- PTF-421, PTF-447, PTF-414, PTF-448, PTF-395, PTF-454, PTF-453, PTF-452, PTF-374
2021-10-13 Hotfix
Plint Application Form is Down (PTF-465)
2021-10-26
Highlights in this release
Faster People search (KERNEL-890)
Listing the result of a People search is now considerable faster, especially apparent when filtering out hundreds or thousands of users.
Search for Specific target language - Plint helpdesk (KERNEL-804)
When searching for tickets as a Helpdesk admin/support staff, you can now filter on user target language as well.
Faster removal of target languages from projects (KERNEL-816)
Bug: Problems when changing linked node to N/A for media in Filezone (PTF-463)
Changing a file to "N/A" for part or language in the project Filezone had temporarily stopped working. Now fixed.
Full list of improvements and additions
- KERNEL-763, KERNEL-804, KERNEL-805, KERNEL-816, KERNEL-864, KERNEL-882, KERNEL-590
Full list of fixes
- PTF-307, PTF-457, PTF-462, PTF-463
2021-11-03
Highlights in this release
DB / Speed optimization (KERNEL-893)
Just like last week, we introduce some invisible but hopefully noticeable changes to speed up the system. You're welcome!
Additional report settings for Plint Subtitler
The list of potential problems and errors that Plint Subtitler can automatically flag has been expanded with two additions:
- Report tool - Forbidden characters (NUTXTWEB-333)
- Report tool - Mixed case inside ord (NUTXTWEB-336)
Bug fix: "Reply to job": suggested date not visible - (PTF-473)
When a resource replies "Maybe" to a job and suggested a new deadline, the suggested date was not visible to project managers due an upgrade-related bug. Now fixed.
Full list of improvements and additions
-
KERNEL-893, NUTXTWEB-333, NUTXTWEB-336
Full list of fixes
- PTF-473, PTF-477
2021-11-08
Fixes in this release
Attachments to Helpdesk tickets lost (PTF-441)
One of these days we're going to stop referring "that upgrade" as the cause of issues. One of these days ....
This one was definitely related to that upgrade, though.
Unable to save file properties in Filezone - (PTF-478)
When editing file information in the Filezone, a required File category would occasionally prevent the changes from being saved. Now fixed.
Split clip - The text direction for the new clip's editor setting is changed (NUTXTWEB-301)
If a Plint Subtitler user split a clip with the option “Split text“ enabled and had the text cursor all the way to the end of the paragraph, the text direction for the newly created clip would be incorrect. This annoyance is now taken care of.
Full list of fixes
- PTF-474, PTF-476, PTF-479, PTF-480, PTF-481
2021-11-16
Highlights in this release
Report tool - Punctuation - Capital letters (NUTXTWEB-346)
This rule will give the user a warning if capital letters are not respected after the use of punctuation.
Fixes in this release
Time offset changed when batch editing file information in Filezone (PTF-458)
Updating the information for multiple files in Filezone with Quick edit / Batch edit had the unfortunate effect of resetting any time offset values for the selected files. Now fixed.
Full list of fixes
- NUTXTWEB-346
-
PTF-461
-
PTF-485
- NUTXTWEB-355
2021-11-23
Highlights in this release
See more job info with job-related Inbox messages (KERNEL-932)

Report tool - Add cps value for reading speed warning message (NUTXTWEB-375)

Bug fix: Calendar not working in Week/Day view - (PTF-488)

Bug fix: Report tool - Extra spaces: Double spaces not detected with Cyrillic characters or other non latin characters (NUTXTWEB-351)
Yes, we finally fixed it!
Full list of fixes and features
- KERNEL-931
- KERNEL-932
- KERNEL-937
- NUTXTWEB-357
- NUTXTWEB-375
- PTF-408
- PTF-417
- PTF-488
- NUTXTWEB-323
- NUTXTWEB-351
- NUTXTWEB-352
- NUTXTWEB-378
2021-12-01
Highlights in this release
Plint Core - Increase .container size (Bootstrap / CSS) (KERNEL-897)
As screen resolution overall increases, so we must follow. Plint Core pages are now somewhat wider by default.
See ASR status and history (KERNEL-940)
If your site has ASR support enabled, you can now see the start and end events of ASR tasks on the Job history tab when editing a job.

Bug fix: Still problems with changing File properties in Filezone (PTF-489)
Yeah, we think we finally squashed it, including all known edge cases.
Full list of fixes and features
-
KERNEL-897
-
KERNEL-940
-
KERNEL-943
-
NUTXTWEB-388
-
KERNEL-927
-
PTF-489
2021-12-07
Highlights in this release
Additional export formats: Text and CSV (KERNEL-857)
Joining the previous output formats are two welcome additions to what you can export from Files tab, within Plint Subtitler or with Auto-create subtitles. These formats are also included on the Download subtitles page
- Text file
- This file only contains the text (with or without HTML formatting) and the subtitle ID. Perfect for offline spellchecking and reference, among other things
- CSV
- This format includes all the data in the JSON files (including annotations, comments and optional data such as Text ID and flags), in a format which can be more easy to use in other systems.
- It also includes in-time and out-time in both SMPTE format and with milliseconds.
Additional options in Project report/export (KERNEL-938)
When exporting job data under Projects / Report, you can now include the following variables
- Shark tank (yes/no)
- Status
- Invoiced
- Price calculation
- PRID (Payment reference ID)
- Editor: MQM mode
- Editor: Load template
- Editor: Limit editing
Report tool - Punctuation - Spacing (NUTXTWEB-34)
When running the Report tool in Plint Subtitler, you can now check for the correct use of spacing after punctuation.
Reset job as a Resource with stored milestone (NUTXTWEB-368)
Resetting a job, for example to load an updated template, is no longer the sole province of a project manager. Anybody with a job can do this in Plint Subtitler, and the nice thing is that a backup of the current file as automatically stored. This backup is called a "Snapshot" and can be found under "Track changes" along with Milestones and Backups.
Full list of features and fixes
- KERNEL-857
- KERNEL-903
- KERNEL-938
- KERNEL-966 /PTF-499
- NUTXTWEB-282
- NUTXTWEB-343
- NUTXTWEB-368
- NUTXTWEB-380 / PTF-475
- KERNEL-961/PTF-495
- KERNEL-963/PTF-497
2021-12-14
Highlight in this release
Change subtitling terms inside Subtitler according to new terminology (NUTXTWEB-267)
Your eyes are not deceiving you. Certain items in Plint Subtitler have been renamed, to improve clarity and consistency. Most prominent among the changes is probably "clip" becoming "subtitle". Complete list below.
---NuTxT-Web.png)
|
Old name |
New name |
|---|---|
|
Clips |
Subtitle |
|
Editor |
Text field |
|
Scene |
Shot change |
|
Time-head |
Playhead |
|
Time-in |
In-time |
|
Time-out |
Out-time |
|
Separation |
Gap |
Full list of features and fixes
- KERNEL-964
- NUTXTWEB-267
- NUTXTWEB-389
2022-01-11
Highlights in this release
Quick Job editing (KERNEL-760)
You can now edit selected properties of a job right from the joblist, without going to the edit form. Hovering over the following will reveal an edit option:
- Status
- Confirmed
- Delivery date
- Assigned to

Plint Subtitler: improved behaviour with timeout in fullscreen mode (PTF-379)
When a job timed out and you were reviewing video in fullscreen mode, there was previously no visible warning before you were sent to the Dashboard. This has now been addressed.
Bug fix: Embedding videos in Help articles fails (PTF-501)
Embedded videos in Help articles would not be visible after save. Now fixed.
Bug fix: Editing file properties in Filezone gives error (again) (PTF-505)
Yeah ... this one again. Now it's even more fixed.
Bug fix: Tree view incorrect (PTF-506)
An updated graphics library resulted in a ridiculous amount of empty space/linebreaks in some context menus. Now fixed.
Report tool rule - Mixed case inside word gives an error/warning if all letters are uppercase (PTF-490)
No longer.
Full list of features and fixes
- KERNEL-760
- KERNEL-818
- KERNEL-862
- KERNEL-877
- KERNEL-949
- KERNEL-967 / PTF-501
- KERNEL-991
- NUTXTWEB-407
- KERNEL-802 / PTF-439
- KERNEL-989 / PTF-505
- KERNEL-990 / PTF-506
- NUTXTWEB-332 / PTF-379
- NUTXTWEB-383 / PTF-490
2022-01-18
Highlights in this release
Filters on dashboard (KERNEL-863)
The new options and filters on the Dashboard make it easier to organize and focus on the right tasks, especially if you have lots of them. You can, for example, show jobs in a certain target language or job type, or filter out the jobs that are "Awaiting corrections". You're welcome!

Backlink when sent to Dashboard on inactivity (KERNEL-974)
Some pages and forms time out on inactivity, sending you to the Dashboard. This minor but welcome change makes it easy to return to the page or job when you return from that interesting water cooler chat.
Project report: only show limited preview (KERNEL-997)
With the possibility to add job data to project reports it became much easier to create really big reports. If these were too big, just showing the report preview on the page could become too much for the browser to handle. Now, only the first 1,000 rows of the report are shown in the preview. To get the rest, you have to export them.
Example of a report setting likely to yield a really big report.

Plint Subtitler: Functionality for 50,59.94,60 fps (NUTXTWEB-288)
Framerates of 50, 60 and such have until now presented problems for Plint Subtitler, forcing a pre-conversion. Now native support has been added.
Full list of features and fixes
- KERNEL-1006
- KERNEL-863 / VIA-001
- KERNEL-974
- KERNEL-976 / VIA-014
- KERNEL-997
- NUTXTWEB-288
- NUTXTWEB-385
- NUTXTWEB-386
- NUTXTWEB-410
- KERNEL-1002 / PTF-512
- KERNEL-1008 / RELATED PTF-517
2022-01-25
Highlights in this release
Manager Role: minor adjustments (KERNEL-988)
The customisable Manager role had a couple of built-in limitations that were preventing some use cases. It is now possible for Manager user to assign jobs freely to other Manager user, including themselves. They also have access to both edit forms under People and Projects unless specifically limited to the "simple" forms.
Subtitler: Shortcut manager - Change of default setup (NUTXTWEB-413)
We have changed the default shortcut setup for new users based on user input and the most common requests. (If you want to change to this setup but already have shortcuts defined, click "Reset" in the shortcuts panel. Please note that this action cannot be undone, however.)
Bug fix: Ampersand in Subtitler text export (PTF-518)
When using the new option to export a plain text file from Plint Subtitler, "&" was rendered as "&", Now fixed.
Full list of features and fixes
- KERNEL-1003
- KERNEL-860 / VIA-050
- KERNEL-988
- NUTXTWEB-395
- NUTXTWEB-411 / PTF-513
- NUTXTWEB-413
- KERNEL-1012
- KERNEL-1020
- KERNEL-1024
- NUTXTWEB-409 / PTF-509
- NUTXTWEB-414 / PTF-516
- NUTXTWEB-415 / PTF-518
- NUTXTWEB-417
2022-02-01
Highlights in this release
File naming presets for Subtitle download page (KERNEL-979)
It has long been possible to build custom filenames for deliverables when auto-creating subtitles. For example: combining project ID, part label and language code, with the delimiters of your choice. When batch-downloading subtitles from a project under "Download subtitles", however, there was only the standard filename option. You can now build named filenaming presets under Tools & Data and apply them here at any time.
(Will we make this feature available in other ways? We would be surprised if we didn't ....)

Text editor - Maintain horizontal alignment (NUTXTWEB-384)
Plint Subtitler's stubborn preference for centering text has now been somewhat tempered. If you select a different alignment when adding a clip, the next clip will have the same alignment.
Full list of features and fixes
- KERNEL-1004
- KERNEL-861 / VIA-051
- KERNEL-979
- NUTXTWEB-384
- KERNEL-1030 / PTF-525
- NUTXTWEB-419 / PTF-524
2022-02-08
Highlights in this release
Preferred pronouns (KERNEL-987)
Users can now specify their preferred pronoun when editing their information under "Profile & Settings". For starters, the selected pronoun is displayed by their name to workbench/admin users, but expect this setting to be used elsewhere going forward.

Recalculate job fees with Resource matrix after Confirm/Accept (KERNEL-946)
When jobs fees are calculated using a Resource matrix, it is automatically converted into a static/custom fee when jobs are accepted or self-assigned. Recalculating multiple jobs after this point has so far been a chore, for example if the running time of a job or the matrix itself is updated and the changes need to be reflected in an ongoing project. A new feature under the "Batch edit" menu on the joblist makes this far easier.
-%E2%80%93-Plint-NU.png)
-%E2%80%93-Plint-NU.png)
Report tool - Forbidden punctuation does not recognize non Latin characters (NUTXTWEB-382)
Bug fix.
"Too many requests" on password reset (PTF-527)
Bug fix.
Full list of features and fixes
- KERNEL-944
- KERNEL-946
- KERNEL-987
- KERNEL-1005 / PTF-515
- KERNEL-1021 / PTF-527
- KERNEL-1026 / PTF-529
- KERNEL-1039 / PTF-536
- KERNEL-1041 / PTF-535
- NUTXTWEB-382
2022-02-15
Highlights in this release
Mostly invisible but important stuff, nothing you would call a highlight. Sorry. We'll have more for you next time.
Full list of feature and fixes
- CICD-58
- KERNEL-1045
- KERNEL-1025 / RELATED PTF-530
- KERNEL-1035
- KERNEL-1046 / PTF-521
2022-02-22
On the coolest date we deployed a small feature and a bug fix:
Batch-set Invoices/PRIDs to confirmed (KERNEL-996)
Finance things: if you know the PRIDs of a number of invoices, you can now change them and their corresponding jobs to confirmed as a batch action.
Plint Subtitler - Alignment in subtitles changes to left alignment randomly (NUTXTWEB-422 / PTF-540
A fix for the recently deployed feature which remembers your preferred alignment setting and applies to the next clip.
2022-03-01
Highlights in this release
Possible for project managers to see whether a subtitling job has been started (KERNEL-985)
Statuses showing which jobs are Done (or not) are sometimes not enough to get an impression on how work is progressing. An additional flag has now been added, called "Subtitling started". What it actually checks for is whether, for a specific job, Plint Subtitler has been opened and a Save event has been triggered. This status can be used to include/exclude jobs under Projects / Find jobs and Joblist filters, and it can also be included with job data when creating a Project report.
-%E2%80%93-Plint.png)
Save job list filter not working (PTF-548)
Storing joblist filter had ceased working. Now it works again!
Full list of features and fixes
- KERNEL-1060
- KERNEL-1063
- KERNEL-1068
- KERNEL-1072
- KERNEL-952
- KERNEL-985
- KERNEL-1025 / PTF-530
- KERNEL-1058 / PTF-548
2022-03-08
Highlights in this release
Multiple flags on subtitle clip (NUTXTWEB-372)
Flags are very useful in Plint Subtitler, but until now there could be only one, per subtitle that is. Now there can be multiple!
---NuTxT.png)
Name change for Shark tank (KERNEL-753)
The trusty old Shark tank has now been renamed to the somewhat less threatening "Job tank". It still does the same thing, but other improvements are on the way.
Full list of features and fixes
- KERNEL-1071
- KERNEL-753
- KERNEL-952
- NUTXTWEB-372
- NUTXTWEB-428
- KERNEL-1059 / PTF-549
- KERNEL-1081 / PTF-555
2022-03-15
Highlights in this release
Additional fee info in joblist view (KERNEL-1051)
Being able to see price calculation method and currency when showing job fees in a joblist will be a welcome addition for many project managers. (Tip: "R" = Resource matrix, "C" = Custom fee)

Adjustments to Application form and Application management (KERNEL-1093)
Succinctly put, applying as a newbie is now possible.
GraphQL: support for additional queries and mutations (KERNEL-1014, KERNEL-1096, KERNEL-1098)
A lot of work is currently going into GraphQL.
Full list of features and fixes
- KERNEL-1014
- KERNEL-1051
- KERNEL-1064
- KERNEL-1070
- VIA-014
- KERNEL-1089
- KERNEL-1093
- KERNEL-1096
- KERNEL-1098
- KERNEL-1102
- MICRO-37
- NUTXTWEB-400
- KERNEL-1056
- VIA-017-FIX
- KERNEL-1082/PTF-557
- KERNEL-1091
- KERNEL-1092
- KERNEL-1097
- KERNEL-1099
2022-03-30
Highlights in this release
Review mode in Plint Subtitler (PR-35)
A major update: Plint Subtitler now has three main "modes", Review being a brand new addition. In Review mode, the layout is even more simplified than in "Limited" mode, allowing people to focus more easily on text and content. (Limited mode corresponds to selecting "Limit editing" in previous versions).
Selecting modes

Review mode in action

Option to deactivate Email templates (KERNEL-1044)
If you've created lots of email templates, you may want to hide some of them from the dropdown but keep them in the archive. Now you can.
Resource fees: store current fee in job history on grab/accept (KERNEL-1077)
Better event logging. The events can be found under Job history.
Exclude basic project data when applying project milestone (KERNEL-1094)
Applying a project milestone now only resets the joblists and, if needed, the parts and languages. Previously other project data could also be reset.
Plint Subtitler: Import TTML files with horizontal alignment (NUTXTWEB-428)
The alignment from the imported TTML files is now inherited when importing into Plint.
Full list of features and fixes
-
KERNEL-1044
-
KERNEL-1062
-
KERNEL-1067
-
KERNEL-1077
-
KERNEL-1094
-
KERNEL-1103
-
KERNEL-1106
-
KERNEL-1109
-
MICRO-47
-
NUTXTWEB-401
-
NUTXTWEB-402
-
NUTXTWEB-403
-
NUTXTWEB-404
-
NUTXTWEB-405
-
NUTXTWEB-412
-
NUTXTWEB-416
-
NUTXTWEB-428
-
NUTXTWEB-432
-
KERNEL-1049 / PTF-541
-
KERNEL-1083 / PTF-556
-
KERNEL-1086 / PTF-558
- KERNEL-1095
2022-04-07
Highlights in this release
Enhancements to recalculate job fees (KERNEL-1078)
The feature that lets you re-apply a Resource matrix again (when project data has changed, for instance) is very new, but we have already improved it. Now you can also use this tool as a "calculator". The specified value will be multiplied with the number of units for the part.
--Plint.png)
Finance: exporting client invoice specifications as Excel (KERNEL-1043)
As an addition to the PDF export, client invoices can now also be export in Excel format.
Help desk: limit number of closed tickets to show (KERNEL-1075)
Listing all closed tickets on the "Closed" tab in the help desk section was perhaps logical, but after a while those tickets stack up. Now only the first 100 are shown, the rest can be found with the Search function.
Include Subtitling started in Calendar filter (KERNEL-1104)
Another new feature already improved: you can now filter out jobs with Subtitling started Yes or No in the Calendar view.

Bug fix: Not able to download attachments from tickets in the helpdesk search view (PTF-53)
Bug fix: Downloading cached versions of subtitles (NUTXTWEB-440)
Problem to import some dfxp files with the framerate 23.976fps (NUTXTWEB-437)
Full list of features and fixes
- KERNEL-1043
- KERNEL-1075
- KERNEL-1078
- KERNEL-1078
- KERNEL-1084
- KERNEL-1104
- KERNEL-1105
- KERNEL-1108
- KERNEL-1117
- KERNEL-1119
-
KERNEL-1047 / PTF-538
-
NETFLIX-442 / PTF-470
-
NUTXTWEB-440
-
NUTXTWEB-437
2022-04-26
Highlights in this release
Sharing files from Plint Core with external users (KERNEL-1123)
A brand new feature for making selected files on any project available trough Plint Core, without requiring users to log in. Read more here.
GraphQL: support for additional mutations and queries
A lot of effort has gone into increased field support when creating projects data and querying job statistics.
Plint Subtitler: hiding in/out cues does not work (NUTXTWEB-431)
We have added support for Plint Subtitler for hiding/locking in/out cues under Detailed settings. This was previously only supported by OE (the old online editor).
Job tank: prevent "over-grabbing" with Priority-based limits (KERNEL-1009)
Based on user priority, the number of jobs which can be picked from the Job tank can now be limited. You can also prevent job grabbing from the list, making it necessary for users to view the details of an individual job before grabbing it. These settings affect the whole site, and will be augmented with additional tools.
Bug fix: Cannot filter projects by target language (KERNEL-1146)
A temporary problem with filtering projects on target language and keyword is now fixed.
Full list of features and fixes
- KERNEL-1146
- KERNEL-1120
- KERNEL-1154
- KERNEL-1141
- KERNEL-1138
- KERNEL-1134
- KERNEL-1129
- KERNEL-1123
- KERNEL-1080
- KERNEL-1009
- NUTXTWEB-431
- NUTXTWEB-387 / PTF-493
- NUTXTWEB-393
2022-05-05
Highlights in this release
Log invoiced price rows and exclude from future invoices (KERNEL-1085)
When you create a client invoice, each individual price row on a project is now flagged as invoiced, including date. If the same project is invoiced again, these price rows will be excluded from the total sum, as well as the PDF/Excel export.


Additional GraphQL support
As in most releases these days, a lot of focus on GraphQL. This batch includes querying additional company information, creating job quicklinks and downloading custom subtitle files over API.
Bug fix: MS file preview broken in Online review mode (CICD-97)
Just what it says in the header, was broken, now fixed.
Full list of features and fixes
- KERNEL-1166
- KERNEL-1066
- KERNEL-1177
- KERNEL-1176
- KERNEL-1169
- KERNEL-1167
- KERNEL-1153
- KERNEL-1151
- KERNEL-1150
- KERNEL-1147
- KERNEL-1128
- KERNEL-1127
- KERNEL-1085
- CICD-97
- CICD-103
- CICD-102
- CICD-101
- CICD-100
- CICD-99
- CICD-98
- CICD-80 Navigation
- CICD-77
2022-05-10
Highlights in this release
Save settings for Auto line-break on user level (NUTXTWEB-441)
Turning off automatic linebreaks in Plint Subtitler will be remembered and applied the next time you go to work.

Bug fix: Report Tool Rule: Separation does not change gap size in job (NUTXTWEB-448)
Bug fix: Video files visible on the Files Tab and not on the client zone while settings say the contrary (KERNEL-1165)
Full list of features and fixes
- KERNEL-1209 API v3 editProject status missing on_hold
- KERNEL-1216
- KERNEL-1208
- KERNEL-1174
- KERNEL-1172
- KERNEL-1168
- KERNEL-1133
- KERNEL-1132
- CICD-105
- CICD-104
2022-05-24
Highlights in this release
Load translations from history or snapshot (NUTXT-373)
This is a big one. Together with the feature that lets user reset a Plint Subtitler job with a stored snapshot, it enables changes in a subtitling template to be incorporated into an ongoing job while not losing all your previous translations. It works like this:
- Start subtitling from a template
- The template is updated (retimed, new blocks added, new flags, whatever)
- Translator clicks "Reset" (1)
- A snapshot of their current file is stored
- Plint Subtitler is reloaded, and the new template is loaded
- but all the translations are gone
- Translator clicks "Load translations" (2) and selects the snapshot that was stored before the reset
- All translations from the snapshot with a matching reference text from the new template are automatically inserted in the corresponding empty fields
- (please note that this will only work for jobs set to "Load template")


Additional information under Tools & Data / Renders (KERNEL-1228)
When checking what's currently being processed under Tools & Data / Renders, you now see when the process began, and there is i link to the project Filezone for all renders

2022-06-07
Highlights in this release (v22.23.1)
Job Tank User Limitations (KERNEL-1009)
Simple controls for Job tank based on user Priority. For example: you can now prevent some (or all) users from grabbing jobs directly from the list, forcing them to go to the job info page first. Furthermore, you can set a limit for how many active jobs a user can have and still be able to grab more from the tank. Limits and rules are set under Tools & Data / Job tank settings.
GraphQL: Control max pagination count (KERNEL-1251)
Support for site-specific limits when querying through GraphQL
Bug fix: Font problem when rendering burnt-in subtitles
A code clean-up cleaned up too much. Functionality for using uploaded fonts with FFMPEG render now restored.
2022-06-15
Highlights in this release
GraphQL: filtering jobs on additional criteria (KERNEL-1239)
As part of our expanding GraphQL support, it is now possible to filter the result in a jobs query on a number of criteria, such as job status and type.
Bug fix: Client can't filter on Project Type (KERNEL-1222)
Even though the client Orders page had the option to filter on project type, it really wasn't possible. Until now.
2022-06-22
Highlights in this release
Text-friendly mode in Plint Subtitler (NUTXTWEB-455)
This one is pretty cool: a new button in Plint Subtitler switches the editor into a mode much more suitable for handling longer texts where line length and a maximum of two lines are not really an issue, such as audio transcripts, audio descriptions, narration scripts and so on. In this mode, the text field is a bit bigger, the font size is somewhat decreased and word wrap is implemented, making it much easier to work with longer segments of text. (This mode is ideally combined with a suitable Report tool preset.)

Bug fix: Invisible project Notes and Messages (KERNEL-1225)
A performance-related refactor temporarily hid Notes and Messages and project level from project managers and other users. Now fixed.
Bug fix: MP4 files with uppercase extension are not processed (KERNEL-1164)
One of the silliest and most annoying bugs in Plint history is now solved: uploaded media files with the mp4 extension in uppercase ("MP4") were not properly processed for Plint Subtitler. Now fixed.
2022-06-27
Highlights in this release
Adjustments to Financial margin report (KERNEL-1050)
In order to make profit margin calculations more relevant, the following changes have been introduced:
- Cancelled jobs are not included (they were before)
- Unassigned jobs are included (they weren't before)

2022-08-18
Highlights in this release
The first deploy after the summer code freeze contained a number of minor bug fixes and improvements.
Custom email to owners of selected jobs from joblist (KERNEL-1179)
Ever wanted to contact, or batch edit, a lot of users on the same project? This new addition to the "Emails" menu on the joblist pages collects the users on all visible jobs and shows them under People. This gives you control of exactly which users to include and all the tools on the People page, including "Email users". Very useful!

GraphQL additions:
- Include price rows in project result (KERNEL-1271)
- Support for adding deliveryAt with createProject (KERNEL-1272)
Bug fix: Uppercase text reloaded as lowercase with Load Translations (NUTXTWEB-454)
Using the Load Translations feature in Plint Subtitler, text that was in all uppercase would be reloaded as all lowercase. Now fixed.
Warnings about deadlines for Preliminary (invisible) jobs on user Dashboard (KERNEL-1291)
There were some mysterious warnings about approaching or missed deadlines for invisible jobs. This happened with jobs set to Confirmation status: Preliminary and such jobs should not be notified to the user. Now fixed.
Bug fix: Can not access Job Archive (KERNEL-1261)
Users with a lot of jobs in their archive would sometimes find that this page timed out. Pagination has solved this problem.
Bug fix: Batch edit for Editing mode has stopped working (NUTXTWEB-444)
It wasn't possible to change the Editing mode in Plint Subtitler with batch editing. Now it's possible.
Bug fix: Calibrate timecode with negative value is not saved (NUTXTWEB-450)
2022-08-30
Highlights in this release
New Invoice status for jobs: Do not invoice (KERNEL-1207)
Some jobs are never supposed to be invoiced. The old solution for excluding them from the Payments page was to set them to "Invoiced". There is now a clearer option, available on job level on the Job fee tab: "Do not invoice". Setting this to "Yes" will remove the job from the Payments page, regardless of other factors. You can, of course, make this option the default for certain jobs by using the same setting in a joblist template.

Breakout MQM (NUTXTWEB-429)
A brand new way of using the MQM review mode has been introduced! This does not change the entire layout of Plint Subtitler, but instead overlays a window for adding MQM issues on top of the normal interface. This enables using some tools that are normally not available in MQM mode, such as script annotation and allows for a more familiar workspace.
You can enable this when editing job settings with the new MQM choice "Yes, as a tool inside Subtitler".
 And this is what it may look like in action. Please note that the window is draggable.

Bug fix: Media processing / Renders page does not work (KERNEL-1318)
Now it works!
2022-09-13
Highlights in this release
Plint Bridge support in Plint Core (KERNEL-1031)
If your system supports it, you can now launch projects in external applications using Plint Bridge and the Download subtitles page.
Bug fix: Files are downloaded from Filezone when I press edit (KERNEL-1368)
Files that were not supported by the internal file viewer had en unfortunate tendency to get downloaded when you just wanted to edit their properties. Now fixed.
Embedding video clips in Help articles fails with no explanation if (tiny) file size limit is exceeded (KERNEL-1305)
Plint Help articles now support embedded videos up to 150 MB in size.
2022-09-20
Highlights in this release
Additional formatting option when exporting/rendering subtitles (KERNEL-1404)
When converting our internal JSON files into deliverables such as SRT, you previously had three formatting options. Say hi to a fourth! With the new option "Keep all HTML formatting", you can now export SRT files (or CSV/TXT) with all HTML tags intact but without the positioning tags.

2022-10-25
Highlights in this release
Support for Skill sets (formerly Language pairs) (KERNEL-1349)
We introduce a major change in how user skills can be handled in the form of Skill sets. In short, they let you specify which languages and job types a user can work in, in the form of combinations. This allows for better precision, where a user may for instance be approved for Subtitling into two languages but QC in only one.

Whether to use the old matching logic or this one is determined on Project level using the new setting "Assignment logic". This will affect how assignment criteria are applied in both Job tank, automatic assignment, reassignable jobs and the "Assigned to" dropdown, visible when editing a single job.
Add project info to notifications about MT and ASR jobs (KERNEL-1309)
The notification emails sent to project managers on completion of ASR and MT jobs now include information about project and target language.
2022-12-21
Highlights in this release
Batch project editing (KERNEL-1535)
A long-awaited addition: after filtering out relevant projects, you can now apply certain changes to all of them at once. Just click "Batch edit". (Available to Workbench users only, not Managers).
Filter projects and click "Batch edit"

Select what to change and submit

Cross project batch editing for jobs (KERNEL-1558)
Even more welcome, perhaps, is the possibility to batch edit jobs across multiple projects. Start out by filtering projects and select "Find jobs". After filtering the jobs as well (you probably don't want to change them all) and clicking "Show results", Workbench users now have the option to "Batch edit jobs". This button will open a form just like the one used when batch editing jobs on a single project.
Note: This is a very powerful option and there is no button for undoing all the changes at once. Project milestones are stored for all projects, however, so if you mess up you can restore them one by one.

2023-01-03
Highlights in this release
Bug fix: Impossible to delete People filters (KERNEL-1641)
People filters can be really useful, but being unable to delete was a nuisance. Now solved.
GraphQL: Additional project filters (KERNEL-1554 )
Filtering projects on Project manager using graphQL is now possible.
GraphQL - create and update media on part (KERNEL-1615)
It's now possible to create new parts on existing projects and attach media to that part.
2023-01-10
Highlights in this release
Default shortcuts (TOOLS-528)
The default shortcuts for a new user of Plint Subtitler have been updated to reflect more common standards. This should reduce a lot of initial configuration for new users.

2023-01-24
Highlights in this release
Add actual delivery time stamp to Projects table in data base (KERNEL-1581)
Statisticians and business analysts rejoice; the date/time when a project is set to Completed is now logged in Plint Core. It's visible in the "Project details & description" section when viewing a project.

GraphQL: Showing dynamic fee for job (KERNEL-1589)
GraphQL now supports requesting the dynamically calculated fee for a job. That's neat.
Bug fix: MQM: Excel sheet in scorecard does not store any subtitle changes from the MQM-job (TOOLS-532)
If you know, you know.
2023-01-31
Highlights in this release
Report tool - Loader (TOOLS-453)
When awaiting the report results on a big job in Plint Subtitler, there's now a loader showing the progress. Nice.

2023-02-07
Highlights in this release
GraphQL: Access part data directly from job (KERNEL-1645)
Until now, it was impossible to access data about the part (such as number of units) for jobs that were not linked to a translation node. Now it's possible!
GraphQL: filter projects on tags, title and project type (KERNEL-1646)
More project filters you say? Here you go!
2023-02-16
Highlights in this release
Bug fix: When adding new parts using EditProject, the total number of parts in the project is not updated (KERNEL-1742)
A fix for GraphQL editProject mutation.
2023-03-21
Highlights in this release
Update the Laravel password policy when creating new user (KERNEL-1688)
Somewhat tougher requirements on passwords.
One Currency - Convert job fees to preferred currency (KERNEL-1483)
Fees calculated with a Resource matrix can now be converted from the Base currency into another currency, based on user preference. Requires currency rates to be set under Tools & Data.
Various Manager role fixes
Several on-page functions and tools that were hitherto blocked from users with login type Manager have now been opened up, based on user feedback and common sense. These functions include:
- Allow manager users to download JSON file from Joblist
- Allow managers to see Job archive for other users
- Allow Manager users access to Tools & Data / Renders
- Allow managers to show user priority in Joblist
- Allow Manager users to assign any users by free text search
- Allow manager users to select Parent project when editing a project
Plint Subtitler: Ability to change time codes using short cuts in MQM mode
Improvements to the MQM editing mode.
2023-03-29
Highlights in this release
More Manager role fixes
- Allow manager users to edit Resource matrices
- Enable notification emails for Manager users
-
Notify when job is done
-
Notify about new Orders / Projects
-
Notify about new support questions
-
2023-05-03
Highlights in this release
People filter do not match skillsets (KERNEL-1831)
Bug fix or feature, perhaps both! You can now specify how to search for People on Target language, Source language and Job types. Just select "Skill sets" = Yes or No.
Additional fee as a percentage when calculating using resource matrix (KERNEL-1803)
It's finally possible to add currency-agnostic rush fees! Specify a percentage value on the "Fee" tab when editing a job. When the job fee is calculated using a Resource matrix, the fee will be adjusted (up or down) based on this value.

2023-05-23
Highlights in this release
Add filters to Job tank list (KERNEL-1806)
Jobs that are placed in the "Job tank 2.0", the GraphQL version, can now be filtered under Tools & Data / Job tank

Bug fixes
- "Use Resource Matrix" in joblist templates not usable/saveable (KERNEL-1870)
- Currency not converting with Calculate job fees function in joblist (KERNEL-1899)
- Part APIMedia ID and Content type not saved when client creates an order (KERNEL-1894)
2023-06-05
Highlights in this release
GraphQL: support for extra_info field in project query (KERNEL-1836)
One the most popular project-level fields can now be queried over the API.
System default matrix not supported by GraphQL (KERNEL-1923)
We thought we thought of everything. Now we have.
Tooltips to clarify new "Skill set" filter option on People page (KERNEL-1893)
What's the point of a new function if it's not clear how to use it?
– Socrates
2023-06-19
Highlights in this release
Missing Tools & Data options when creating Manager roles (KERNEL-1947)
Additional control over what tools can be made available to Manager users.
2023-07-03
Highlights in this release
Bug fix: Old Online editor (OE) has stopped working (KERNEL-1964)
Yes, it's old but it still has its uses from time to time.
Support for Cross-project batch editing for Managers (KERNEL-1976)
One of Plint Core's most powerful features can now be made available to Manager users. The option is found in the (newly renamed) section "Power tools".

2023-08-07
Highlights in this release
Increase the number of projects that can be edited using "Batch project editing" (KERNEL-1967)
From 50 to 100. Such a little thing can make such big difference.
2023-08-22
Ensure skill sets are used (KERNEL-1979)
In order to facilitate the use of Skill sets for matching users with jobs, there is now a system option that sets this as the default for the whole site. Setting "Default assignment logic" to Skill sets under Tools & Data / System settings will make sure that projects have this setting from the start. This includes projects created using the API.
2023-09-04
Spell checker - Incorrectly reports misspelled words for Lithuania (TOOLS-792)
Just a little bug fix.
Subtitler Report presets: Additional options for reading speed setting (TOOLS-752)
This change adds control over whether spaces, punctuation and linebreaks are included when calculating the reading speed.
2023-09-12
Bug fix: Batch edit project failing for Manager users
Manager users with the option “Cross-project batch editing” on have access to the “Batch edit” option under Projects. This fix solves a problem when using this feature.
2023-09-20
New rule in auto_upload to prevent over-fetching
The auto upload feature is very powerful, but when incorrectly configured could result in over-fetching. This improvement checks if the fields used in the file naming actually have values. If not, job is cancelled and PM notified.
2023-10-19
ASR Capitalization Issues
This update solves most of the known issues where words were incorrectly set in all lowercase in the ASR result.
2023-10-24
Expand Load translations to reuse translations from other languages
This is pretty great: Load translations can be employed to reuse translations from other languages or parts on the same project. More here.
2023-11-14
Load translations: additional option under "Allow import of titles"
This small but important addition to Load translations gives you additional control over which languages and parts you can import translations from. With this setting, you can make any job the "completion job" by adding any tag to it.
Subtitler: Shortcuts not working in Annotations
Plint Subtiter shortcuts now work as expected even when the cursor is placed in the Annotation field, finally solving a known annoyance.
2023-11-21
ASR: Storing speaker labels as Annotation
Support for speaker recognition has been added to the ASR delivery method. You can select whether to store the result as part of the subtitle or in the Annotation field.
Plint Subtitler: Bug fix: Text cursor acts strange if there are to many italics tags in a subtitle
Report tool rule separation - Enable value 0 in settings
You can now store 0 frames as the preferred gap between subtitles. That's nice.
2023-11-28
Offer job to random matching user (complement Find next best choice)
When users decline a job offer, it has long been possible to have Plint automatically send the offer on the "next best choice". Sometimes, though, variation is better than predictability: hence the new option. This option still requires all assignees to match the criteria, but the order in which they will get the offer is, well, random.
Should all matching users decline, or fail to answer within the confirmation deadline, PM will be notified about this.

Store use of joblist templates in database
Wondering if you can safely retire (delete) an old joblist template? Each time a joblist template is applied, manually or using API, a record is now stored. The result can be seen under Tools & Data / Joblist templates.

2023-12-05
Plint Subtitler: Support for Search & Replace in Annotations
Text in the Annotations field can now be found and replaced using Find/Replace in the Edit menu.

Support for changing Status and Client Company when Batch editing projects
The Batch edit project function, available to Workbench users and selected Managers, now supports additional fields and the layout has been improved to accommodate all the options.

Enable Editor settings "Reference text" for Subtitler
Reference/original text can now be hidden for certain jobs using Editor settings.
2023-12-12
Support for Project category and Project type under Project / Batch edit
More fields under Project batch edit!
Delete and reparent
A very welcome addition when batch editing joblists: you can now, in most cases, maintain the sequence of jobs when deleting jobs in the middle of a workflow. The logic is simple: the parent of each deleted job inherits their respective child jobs.
Before

Batch deleting Spot QC jobs with the Reparent option on

After: Spot QC jobs are gone but the sequence of jobs is intact

2023-12-20
ASR ignores Media offset
Subtitles created using the built-in ASR function now takes media offset into account.
2024-01-09
Bug fix: Impossible to select "No role" for Manager users
2024-01-17
Run joblist template with Batch project edit
You can now select a joblist template and apply it to multiple projects. Use with caution!
2024-02-06
Quick edit selectors in Joblist do not disappear after selection
A very annoying front-end bug finally fixed
2024-02-22
Unsubscribe option in Plint emails (MVP)
In order to comply with new directives from email providers such as Yahoo and Gmail, you can now show an Unsubscribe option in system emails (like the ones sent from the People page.
2024-03-06
Update password requirements in Core
Tougher requirements when changing password.
2024-03-12
KNP Improvements
- Optimize import of KNP-lists, as in very big lists can now be imported
- Handle line breaks in Core to identify KNPs in source data
- Bug fix: If the KNP contains short terms, there will be a lot of false positives within words.
Allow JSON extension when importing into Plint Subtitler
Until now, .txt was the only allowed extension when importing Plint JSON files. Now, .json files are just as welcome, as long as they are correctly formatted.
2024-03-19
Import Plint JSON to Core with GraphQL
The new mutation importSubtitle enables you to ingest a Plint JSON file into a project.
2024-04-03
Show Internal Price comment in Client invoicing view
If there is information in this project-level field, it will be visible in the Finance view för client invoicing.
2024-04-09
Improve UI for the comment section in Subtitler
An abundande of comments linked to a single subtitle block was not handled very well. Now it is.
2024-04-16
Bug fix, Plint Subtitler: If reference text is set to hidden, it's still visible in Find/Replace
2024-04-23
Add new event and conditions to webhooks
When specifying webhooks under Tools & Data, you can now work with much greater precision. Hooks can be dispatched with the following criteria:
- Project has a specific Client company
- Project has a specific tag
- Job has a specific job type
- Job has a specific tag
This allows for tailor-made webhooks, for example when a certain client with a platform of their own is to be kept in the loop regarding specific jobs/steps on their projects.
There are also two new events: Assignee updated and Confirmation status changed.
2024-05-07
GraphQL: Additional filters
-
projects query: Find by (multiple)
-
client companies
-
parent project
-
Completed at (date range)
-
Created at (date range)
-
-
jobs query: Find by (multiple)
-
parent job
-
assignee
-
project ID
-
2024-05-14
Support for alternative email with GraphQL users query
Just what it says: you can now fetch alt email for users with GraphQL query.
2024-05-29
MFA support for all Plint accounts
The TOTP standard for multi-factor authentication is now supported for all Plint accounts! This means you can use Microsoft Authenticator, Google Authenticator or any other app supporting this standard to add an extra security layer to your account. Self-enrollment supported from the user profile page.
2024-06-11
GraphQL: find project and part by Part Media ID or Part name
Yet another useful filter option!
2024-07-09
Subtitler: Shortcut - Text: Send word to subtitle
A quite useful shortcut allowing you to quickly send the first or last word in a subtitle to the preceding or following subtitle. With an option to adjust in/out time as well!
2024-08-20
Bug fix: Connection profile dropdown empty when creating new job
This fix affects Auto delivery jobs and Auto upload jobs.
Bug fix: Event linked to Manager when they add events for freelancers
This annoying problem is also fixed now.
2024-08-27
Add additional fields to price rows
You can now specify source and target language for each price row added to a project.
2024-09-17
Support currency conversion for custom fees
Currency conversion rates can now be used to automatically convert a custom fee to the user's preferred currency. (Previously, this was only supported for dynamic fees).
2024-11-19
Highlights in this release
More naming options when using Auto Create Subtitles and Subtitle filename presets
You are now given several additional options when creating filenames.

Avoid auto-assigning users with conflicting job types
This brand new feature lets you specify job types which should not be assigned to the same user on the same file/part/language. This will then automatically be applied with Job tank and "Find random matching user".
Support for additional audio tracks in Plint Subtitler
You can now upload a file to a project, link it to a part or project and set it to File mode: "Additional audio track". When Plint Subtitler opens, you will be able to switch to this audio track.
2024-11-26
Highlights in this release
People page optimization
In order to speed up and future-proof the People page, some major refactoring has been done. In order to avoid performance issues, we have been forced to (at least temporarily) remove some functionality: namely the ability to order users on Jobs, Total jobs and Latest job.
2024-12-03
Highlights in this release
Only convert custom fees if job is Awaiting confirmation
For perfomance and logistical reasons, stored job fees are now only converted between supported currencies if the job is awaiting confirmation.
Option to remove applications under People
There is now a delete icon under People / Applications. Please note that applications linked to an active Plint account cannot be deleted.
2024-12-11
Highlights in this release
Bug fix: Tansa Spell Check browser extension is not working in Subtitler
General project description field visible to all job assignees and in job tank
When you have some information which can and should be visible to everyone working on a project, there is now a new field available: "General project information". This field also supports formatting, such as tables and bullet list. Content will be shown on the job info page for all jobs.

Batch-fill job tank
With the new "Batch actions", available to Workbench users and selected Manager users, you can now send jobs from multiple projects to the job tank. Note: this only affects sites using "Job tank 2.0".
Improve Auto delivery delivery method
Two small additions but total game-changes in some workflows.
- Add job ID to filename
- Inserts the ID of the Auto delivery job to the start of the filename, e.g. "J12345_original_filename.pdf"
- Together with webhooks or API requests, this enables workflows and solutions where you need to know exactly where in the system a file belongs.
- Only send newest file
- Perfect for redeliveries: when a new version is uploaded, only this will be delivered to the external location even if there are older versions linked to the same node.

Additional MQM category and error types
For Dub script and Dialogue list QC, there is now a new MQM mode. This shows different categories and error types in Plint Subtitler and reports.

2025-01-14
Highlights in this release
Plint Subtitler: Monitor - Show subtitles with box
You can now show a box with customisable transparency behind the subtitles in Subtitler, making the text easier to read against noisy backgrounds and burnt-in text. Just click the Monitor settings icon.

Small but great additions
Project forum: accessible from Plint Subtitler
For easy access to the Project forum, just click the new button in the top bar'

Report Tool Preset ID in job details
Now, you can easily see the ID of the report tool preset in Plint Subtitler

Report tool preset - Show client keyword and client company in preset list
As a complement to the above, it's also easier to see which report presets are used where by checking the list under Tools & Data

Fixes
- Unassigned automated jobs reported as Done by PM
- This small nuisance had some unwanted consequences, not the least being the fact that the project manager missed some important notifications. Now, unassigned jobs are linked to the "System user"
- File categories for File upload jobs not added from joblist template
- You can now specify required File categories for File upload jobs in a joblist template and have them included with the created jobs.
- Missing strings and connection profile when batch editing Auto delivery jobs
- When batch editing Auto delivery and Auto upload jobs, you can now change the Connection profile
- No warning when exceeding max unitPrice for price specifications
- The max unit price for price specifications is 999,999. You now get a warning when exceeding it.
2025-02-11
Highlights in this release
ASR improvements
We added a new segmentation method called "Dialog List", which groups a speaker’s continuous speech into one subtitle, as long as there is no pause longer than two seconds.
2025-02-18
Highlights in this release
Enhanced Spell Checker with More Languages:
We have added support for the following languages in the Plint Subtitler Spell Checker:
- Hindi (India)
- Japanese (Japan)
- Tamil (India)
- Telugu (India)
2025-02-25
Highlights in this release
New Delivery method: Create report
With this automatic Delivery method, the number of subtitles in the file linked to the same node as the job are counted. You also see the number of subtitles with different flags. The result is stored in Filezone, either as a simple text file or as a CSV.
Bug fix
- Additional fee not included when invoicing jobs in Classic
2025-03-04
Highlights in this release
Shared vendor accounts
Individual user accounts can now be allowed to switch to a parent account after login. Only Resource accounts with the Vendor setting can be set to Parent account.
2025-04-10
Highlights in this release
Plint Subtitler
- Shortcut - Enable Subtitle: Add flag in Subtitler limited mode
- Multi-range selection in the "Select range tool" - Index-based ranges
Bug fix
Confirmation deadline not applied (bug in Shared vendor accounts)
2025-04-17
Highlights in this release
Importing TTML with GraphQL
API mutation now supports importing standard TTML files as well as Plint Json without the need for pre-conversion.
Bug fix
- Report tool rules: Text change
- Swapped headers in the list when editing Report rules under Tools and data
2025-04-31
Highlights in this release
Filters in Job archive
Under Job archive, users can now search among their jobs.
-
using text search on project name
-
using project ID
-
based on target language
-
Language selector only includes languages matching jobs they have worked on at some time
-
-
Delivery dates, from and to
These filters are also added to the User profile page available to managers.

Accessing your Job archive

Filtering your Job archive
Share page enhancements
-
Filter options
-
Language
-
File mode
-
Extension
-
Name contains
-
2025-04-08
Highlights in this release
Additional information in notifications about Auto delivery events
The emails sent to PMs when an Auto delivery is run now contains more helpful information.
2025-04-23
Highlights in this release
Additional field "Ready to Invoice" when batch-editing projects
2025-05-07
Highlights in this release
Bug fix: Time offset not saved with File upload jobs
Supplying a Time offset value with normal File upload jobs did not work correctly. An edge case, now fixed.
2025-05-12
Highlights in this release
Improved traceability for Auto upload and Auto delivery events
Job history now shows more information about these automatic delivery methods.
Example: Successful Auto upload, showing which connection profile was used and how many files were included

Additional filter option in Job archive: Job type
You can now filter on Job type in the job archive. Which is just another way of repeating the info in the header above. Sorry about that. Here's a screenshot!

2025-06-10
Highlights in this relase
Subtitler Spell checker: Added dictionaries
- Albanian
- Bosnian
- Macedonian
- Serbian
- Ukrainian
2025-06-23
Highlights in this release
Trigger webhooks and auto jobs with GraphQL
The long-since added ability to change job statuses with GraphQL now enables more automation with the following changes.
- Using the reportAsDone mutation now triggers any matching webhooks and automatic child jobs
- using the editJob mutation to change status bow triggers any matching webhooks
2025-07-15
Bug fix: The user's job file gets overwritten when re-entering Plint Subtitler via the browser back button
A reported problem where a previous version/file could be loaded by going into Plint Subtitler using the browser's Back button, plus a couple of similar scenarios, has now been addressed.
2025-08-11
Bug fix: Conflicting jobs conflict too much
Turns out there were some cases where our clever functionality for preventing some jobs from being assigned to the same person (think "QCing your own translation") didn't work as intended. For example, getting "conflicting jobs" in different languages on the same part was prevented. This has now been addressed.
Bug fix: editProject mutation changes mediaRuntimeUpdate
Using the editProject mutation without specifying a value for mediaRuntimeUpdate had the unintended consequence of setting this value to its default state. Now fixed.
2025-09-10
Highlights in this release
Additional subtitle in Plint Subtitler
Plint Subtitler already had support for showing the original template text, as long as this text was included in the JSON file. Sometimes, this is not an option. With the new file mode "Additional subtitle track", Plint Subtitler can display alternative subtitles in the monitor as a support during translation or QC. These do not need to be in sync with the actual subtitles you are working on, but they need to be in VTT format.
How to prepare
Manually or automatically upload a VTT file to the project, set the File mode to "Additional subtitle track" and link it to the correct part.

How to use in Plint Subtitler
If there is an additional subtitle track available, it will be automatically shown in the monitor, at the bottom of the screen. You can hide this by clicking the icon.

Improved shot change detection when processing media
The solution for detecting shot/scene changes has been upgraded, creating more precise results.
(Note: This has previously been deployed to selected sites for evaluation, and is now added to all instances.)
2025-09-15
Highlights in this release
New filter options under People (for finding inactive users)
In order to facilitate user management, we have added filters aimed at finding inactive users based on the below criteria. Please note that they are just as useful, or even more useful, as Exclude criteria.
-
Logged in after (date picker)
-
Latest job (date picker, checking job creation – skipping Cancelled jobs)
-
Latest Helpdesk ticket (date picker, checking last reply in thread)
-
Latest client contact assignment (date picker, checking project creation date)
Anonymize user option
To simplify GDPR compliance, personal data can now be removed from user accounts at the click of a button. This function can be found at the bottom of the user profile page. (Please note that this option is only available for Workbench users and Manager users with the "Anonymize users" option activated.

2025-10-09
Highlights in this release
Linebreak adjustment as a delivery method
Added as a new delivery method in Plint Core, the "Auto linebreak adjustment" option attempts to fix CPL errors by shifting words within the same clip up and down. It adheres to the "Maximum characters per line" rule for the Report tool in use.
An example use case might be when a subtitle is imported from elsewhere, with different CPL rules than the current requirements. Before manual conformance begins, adding a "Auto linebreak adjustment" job after the import can solve many of the linebreak problems before the manual step.
What it does:
-
Identify clips that exceed the CPL (Maximum characters per line) value from the Report tool
-
Add linebreaks based on the following priority
-
Where possible, use punctuation (full stop, comma, question mark …)
-
Strive for similar line length
-
If possible, make two lines into one
-
Unless speaker hyphens are used
-
-
-
Do not remove empty lines after subtitle text
-
(Used for positioning in some cases)
-
2025-10-28
Highlights in this release
Bug fix: Download subtitle file via Quicklink does not work
Subtitles with identical in/out times causes incorrect out time in Subtitler
Those really long subtitles you could sometimes see, they were actually really short. As in 0 length. And now handled better.
2025-11-13
Highlights in this release
Bug fix: Inconsistency in Dashboard when ordering jobs on Language
Previously, ordering on Language hid jobs not linked to a language node. Now fixed.
Additional webhook conditions
Refining the webhooks further, we have now added options to prevent triggering webhooks on job creation, as well as the possibility to trigger only on certain job statuses.
Additional filter option under People: Created after
Speaking about refinement, you can now filter out people whose accounts are created after a certain date. This option is also available as an "Exclude" filter, of course.
2025-12-18
Highlights in this release
Project manager Progress overview
As a complement to the Dashboard, the Calendar et al, there is a new option under Projects: "PM overview". This page only shows projects matching the current filter and is intended to provide an at-a-glance view of progress and jobs in need of action. It comes with built-in quick links for showing various jobs/views. Try it out.
Tip: clicking the edit icon for a job will take you to the edit form, saving will send you back to the PM overview, with the same filter settings
Starting view

Summary on part/language level

2026-01-14
Highlights in this release
Additional project filters
Joining the hallowed ranks of filter options under Projects are some new additions:
- ID higher/lower than
- Pro tip: use these in conjunction with batch editing, to split projects into ... batchable batches
- Part name / Part ID contains
- For the first time in Plint Core history, you can now find projects based on part information
- Description contains
- List of project IDs (comma separated)

Bug fix: Joblist templates - Incorrect info about last project
Remember how the information under Tools & Data / Joblist templates used to present incorrect information about which project a template was last applied to? Well, not anymore.

2026-01-28
Highlights in this release
Media connected to project node now plays in Subtitler
It has always been possible to link a media file to the project node and have it show in Plint Subtitler jobs in all parts, but it never actually worked if the job itself was connected to the project node. We have now, finally, addressed this glaring omission.
2026-02-04
Highlights in this release
Handling/avoiding joblist timeouts (pagination and performance improvement)
With very long joblists (several hundreds or thousands of jobs), the page sometimes times out. This has now been alleviated in two ways.
- Through optimisation, the same number of jobs now load quicker, with reduced risk of timeout
- It is now possible for a user to set a max number of jobs to show on each page
- This value will be applied to all joblists
- If the job count exceeds this value, you will get pagination buttons (just like with People and Projects)
The pagination option is found after the "Show job fees" button

Auto Delivery trigger button
Auto delivery jobs could previously only been triggered by a status change on a parent job. For redeliveries and exceptions, this was not very convenient, so now there's a button in the joblist for triggering the job.
2026-02-18
Highlights in this release
Track Changes - Add filter and counts
Finally! The Track changes feature in Plint Subtitler now has quick filters to show different kinds of modifications between the milestones, and you also see how many changes of a certain type there are.

2026-03-18
Highlights in this release
Bug fix: Batch download broken on projects with MASH setting
If a project had the MASH setting for media processing, the batch download feature in Filezone didn't work. Now fixed.
Improvements to PM Overview
The fairly new view for showing information about jobs across multiple projects has been updated with numerous improvements and additions, including:
- Colour code adjustments
- Layout improvements
- Filter form
- E.g. Possible to filter on status and parent job status (meaning, you can find which jobs are ready for work)
- Parent job with status colour code also shown in separate column
- Jobs with automated delivery methods such as Auto create subtitles, Auto delivery, etc, are excluded from the Unassigned column
- Quick link to view project joblist (click on project ID)
- Quick links to Notes and Messages tab of a job always available (highlighted if there are open items)

2026-03-25
Highlights in this release
Bug fix: Jobs excluded from project report if they changed status to Done from Subtitler
This elusive issue has now been addressed/squashed. All jobs should now be included when creating Project reports
No explanation when opening busy Subtitler job with Quicklink
The redirect page has been updated with an explanation when two user try to access the same job using a quicklink.
2026-04-01
Highlights in this release
Include "by whom" in email notification about reassigned support ticket
Help desk users rejoice (or beware)! No more stealth reassignment of support tickets. The information in these emails now include who it was who decided to ditch this job onto you.
Make Auto upload adhere to parenting rules
Most of the time this didn't really matter, but right is right. An Auto upload job will no longer run if it has a parent job which is not set to Done or Verified.
Include project info in filename with Auto delivery
The Auto delivery method now has a third file naming option: "Append details". This will include more than just the Job ID, making it easier to track from where the file originated, and also easier to re-ingest after changes using Auto upload.

2026-04-28
Highlights in this release
Additions to PM Overview
The PM Overview page keeps improving.
- Filter on Assignee: none
- Filter and group jobs on job type, regardless of label
- A stored favourite filter will be automatically reapplied when you return to this page
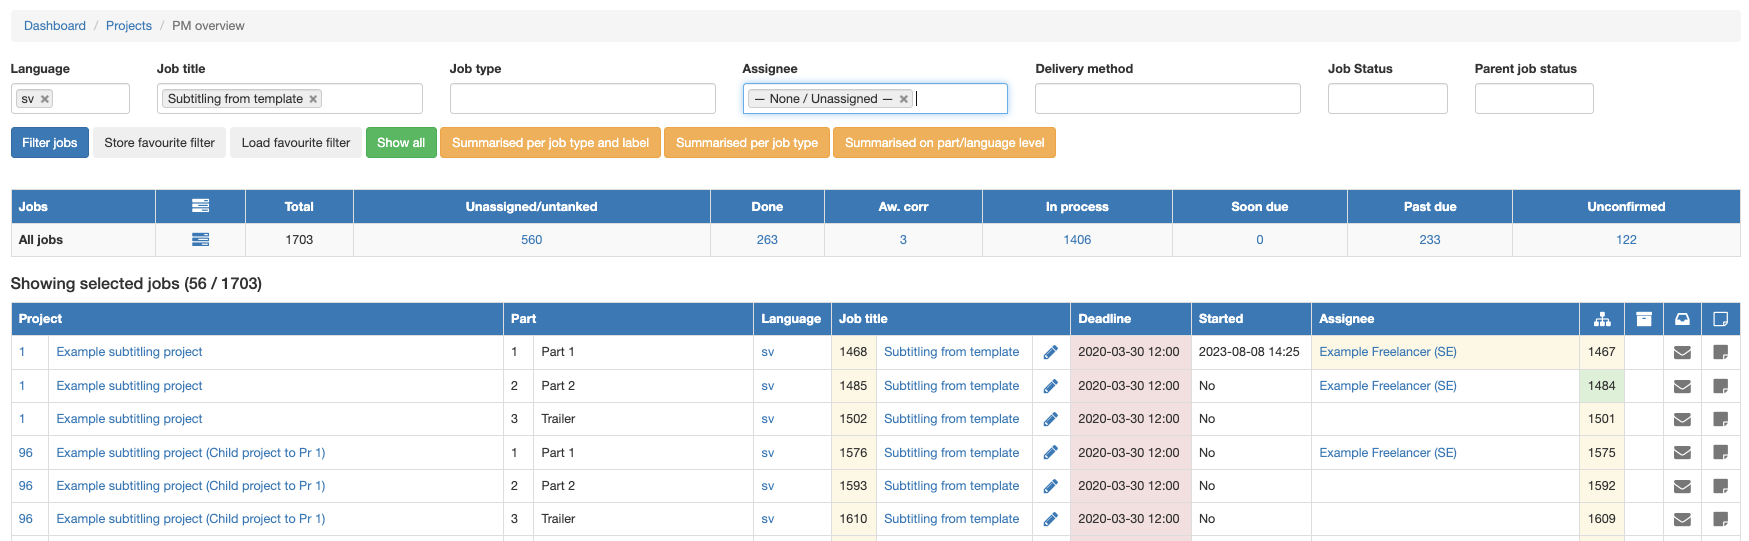
Better support for overlapping clips in Plint Subtitler (and showing annotations in timeline)
Whether they were added by mistake or by design (such as dub scripts), events that overlap in time are now far easier to work with in Plint Subtitler.
The height of the subtitles will be automatically adjusted to accomodate up to five events

After this, you can vertically scroll the timeline
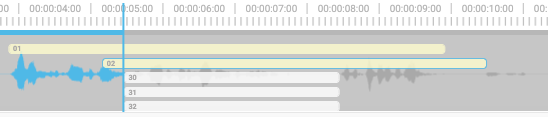
Showing annotations in timeline
When annotations are used for speaker labels, it helps to see them in the timeline. There is a new option for this.
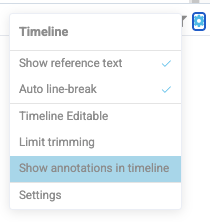

Overlapping text in monitor
By default, text which overlaps will be shown in its selected position. This can lead to overlap.

There is also a new option to "Stack subtitles" which can be helpful in certain cases (again, dub scripts come to mind).
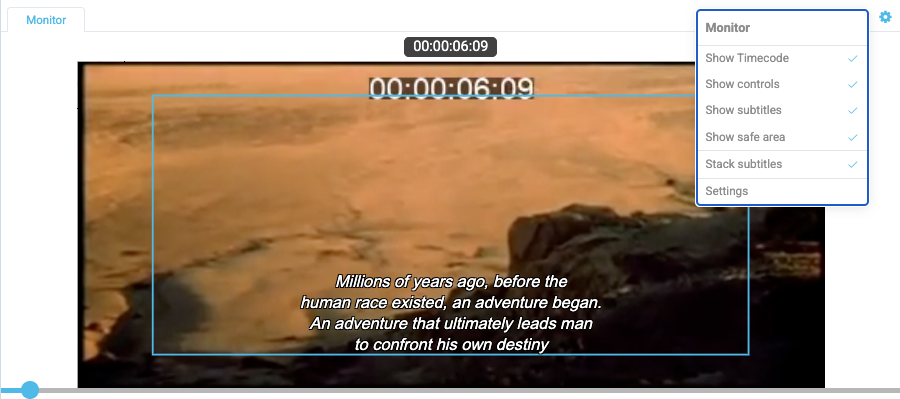
2026-05-04
Highlights in this release
Additional job tank options
In order to create a more level playing field you can now adjust the rate at which users of a certain priority level can pick up jobs from the job tank. This will work regardless of how jobs are grabbed, manually or by some form of automation.
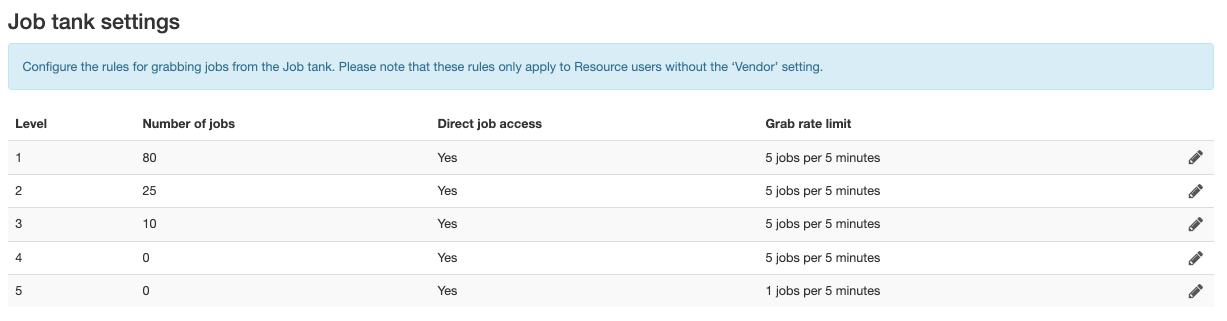
Add non-drop attribute in TTML script
One of those "a tiny thing that makes a big difference" things. When auto-creating/exporting TTML files from Plint Core, there is now always dropframe information included in the header. This information is based on the project setting.